Workflow Guides
How to Connect Meeting Minutes to Revit
Learn how take meeting minutes that connect to Revit
Quick Punchlists in 6 Easy Steps
Learn how to easily perform one of Layer’s core workflows, Punchlists.
Are you looking for a more integrated approach for taking, tracking, and sharing punchlist issues? Use Layer to capture punchlist issues, which you can then view directly in your Revit model. Keep your team organized and focused on the building context and not buried in their inbox.
Watch the video above or use this step-by-step guide to get started:
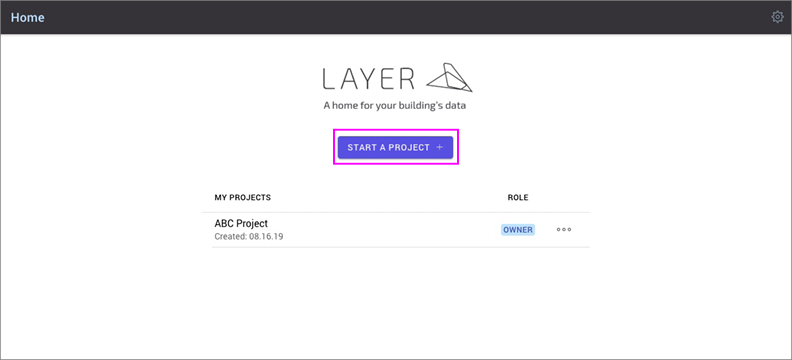
1. Open Layer and create a new Project
Log in to Layer or create a new account. In the dashboard, select “Start a Project” to create a new Project.
2. Create new Room Elements with the “Rooms” Category
Select the "Create an Element" button in the bottom navigation bar to create a new Element for each room manually. Or choose to import data by CSV file or by connecting the Project to a Revit model to load Room Elements automatically.
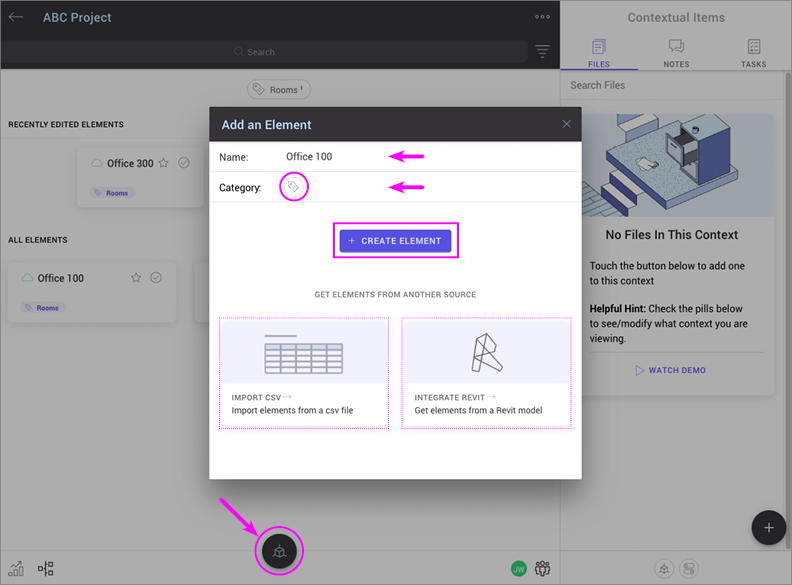
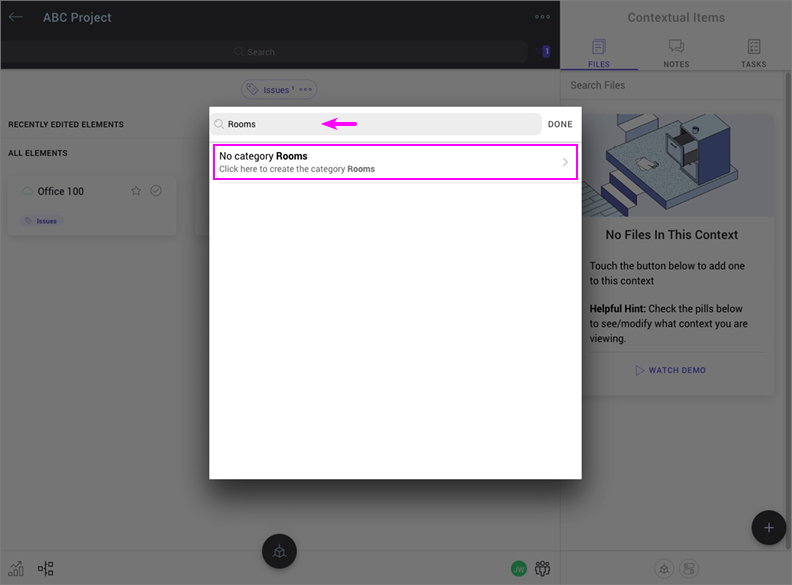
Create a new Category called “Rooms” by selecting the “tag” button, naming the new Category, and then selecting “Click here to create the category...”
Tip: We like to do this initial set-up in the office, but Layer’s flexible platform also lets you do this on the fly and in the field.
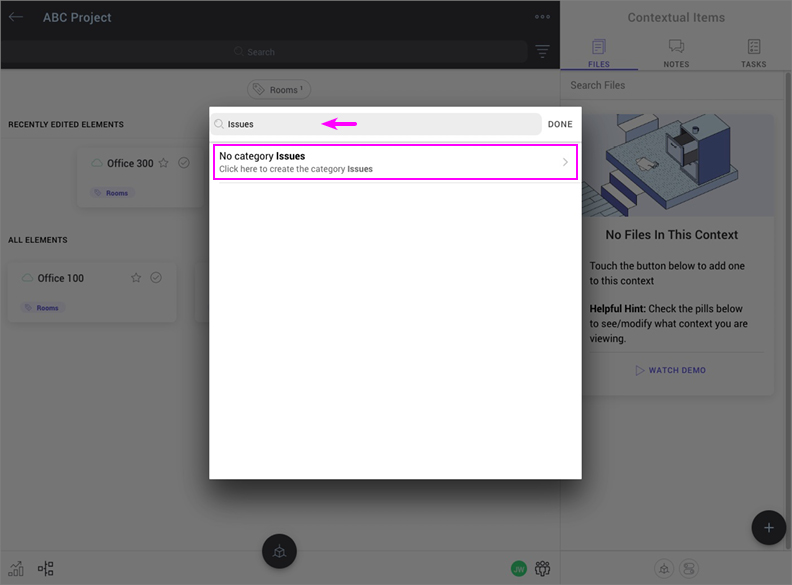
3. Create new Punchlist Issue Elements with the “Issues” Category
Select the "Create an Element" button in the bottom navigation bar to create a new Element for each Punchlist issue.

Create a new Category called “Issues” by selecting the “tag” button, naming the new Category, and then selecting “Click here to create the category...”
Tip: We know building walkthroughs happen fast. Layer makes it easy to capture information on the fly and organize it later when you’re back in the office.
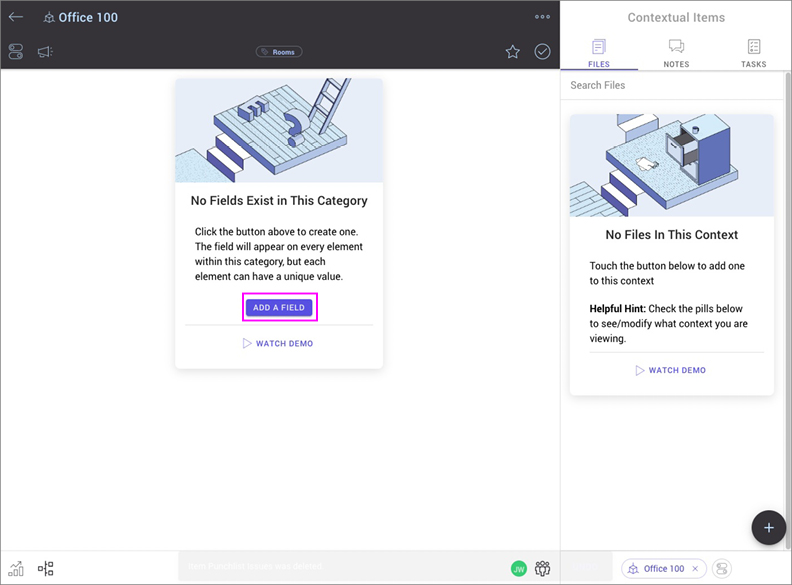
4. Create new form fields in the Room Elements
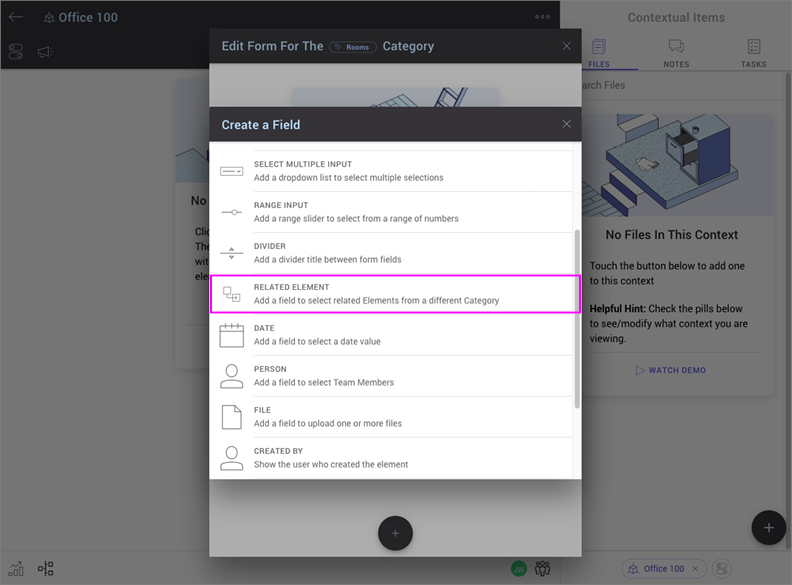
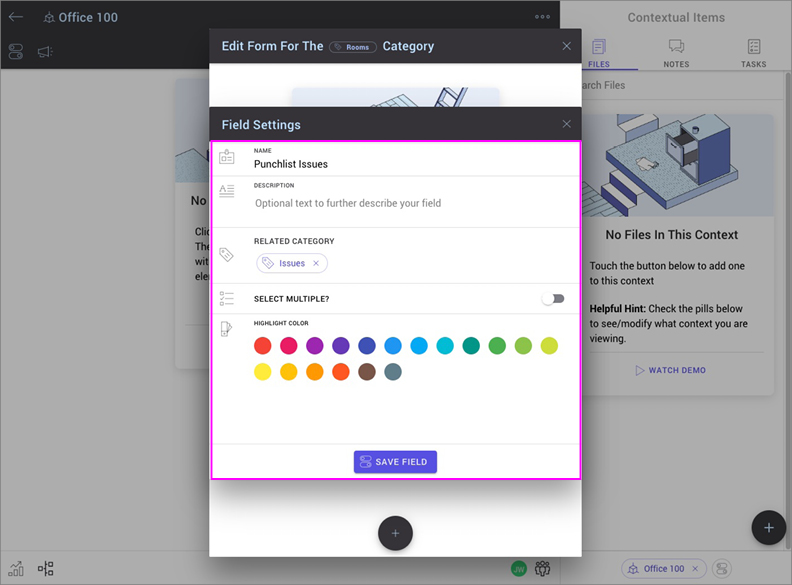
Within the Room Element, select the “Add a Field” button to create new form fields. Make sure to include the Related Element form field titled “Punchlist Issues” so Punchlist Issues can be easily associated and referenced in each Room. Populate the fields as needed.
Tip: Form fields only need to be set up once in a Room Element since these fields will propagate to all Rooms within that Category. Create different types of templates by assigning each its own Category.
5. Create new form fields in the Issues Element
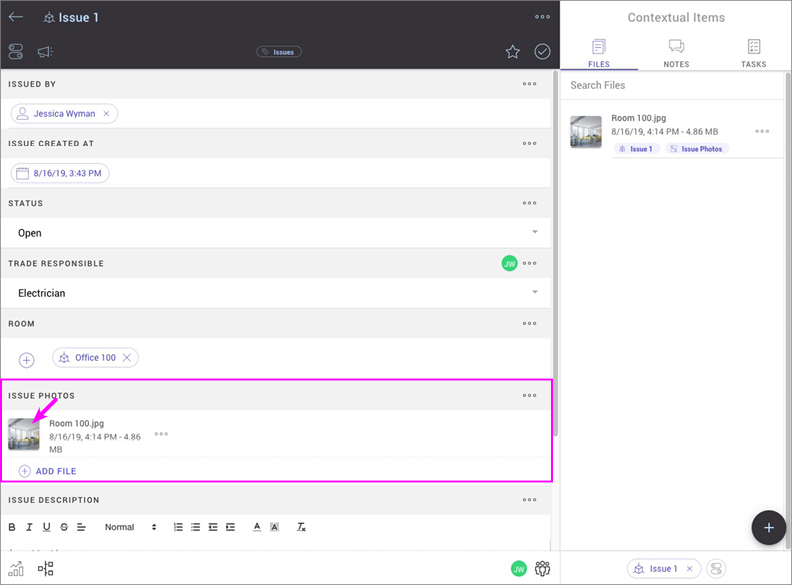
Within the Issue Element, select the “Add a Field” button to create new form fields. Make sure to include the Related Element form field titled “Room” so the Room can be easily associated and referenced in each Punchlist Issue. Populate the fields as needed.
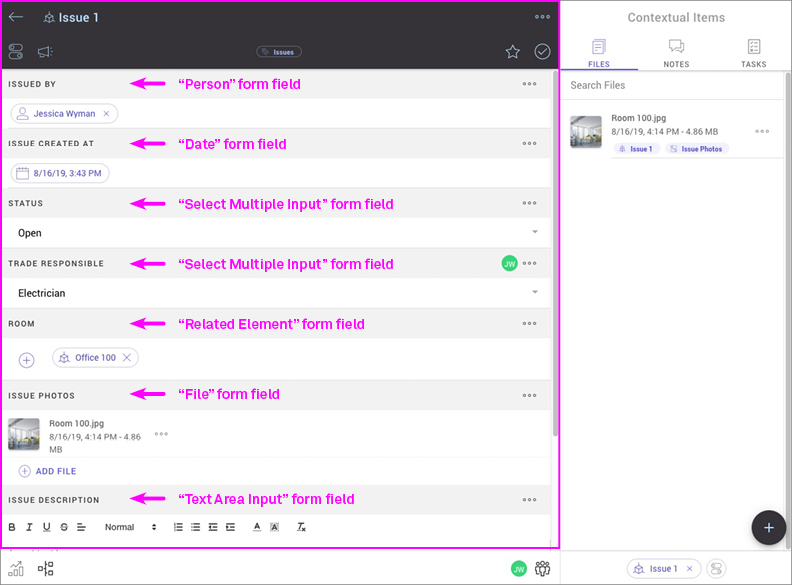
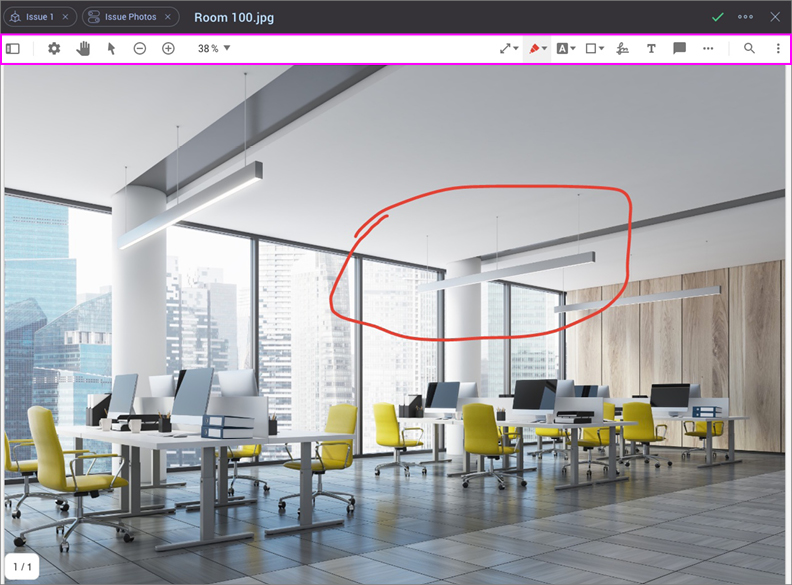
Use the File form field to add photos to the Issue Element. Easily mark-up photos and files by clicking on the photos or file to open the PDF/DWG Mark-up tool. Redline and comment as needed, all changes will save automatically.
Tip: We like to include a Text Input form field titled “Trade” so we can easily sort the report and send trade-specific issues to each trade.
6. Export the Punchlist as a Report
Select the "Reports" button in the lower left corner to export a report.

Tip: If you attached a Revit model, you can instantly see the Punchlist Issues as you click through the model. The information you need to design is now connected to the tool used to produce the design.
Layer makes creating and sharing Punchlists more efficient by keeping every piece of information and every team member exactly where they need to be: in the context of the building. Say goodbye to busy work.
Do you want to take faster and more organized Punchlists?
Try Layer free for 14 days now!
Learn how take meeting minutes that connect to Revit
Learn how to easily perform one of Layer’s core workflows for historic preservation building professionals, the Conditions Assessment.
Here’s a quick tutorial for using Layer to efficiently create and manage Room Data Sheets