Two ways to rename fields (columns) in a Layer category: through the Layer UI, or in bulk using the REST API with a spreadsheet as your source.
Layer fields (columns) within a category can be renamed at any time. This article covers two methods: using the Layer UI directly, or using Microsoft Excel to rename fields in bulk using a spreadsheet as your source.
Method 1: Rename Fields in the Layer UI
This method is best for renaming one field or a small number of fields.
Open your project in Layer and navigate to the relevant category.
Click the field name you want to rename. The field settings panel will open.
Edit the Name field at the top of the panel.
Press Enter or click outside the field to save.
Repeat for each field you want to rename.
Method 2: Rename Fields in Bulk Using Excel
This method uses Excel's built-in Power Query to pull your current field list from Layer, match it against your target column names, and send rename requests, all without leaving Excel.
Prerequisites
Microsoft Excel for desktop (Windows only works with Other Online method, no Mac). (Excel Online does not support this workflow.)
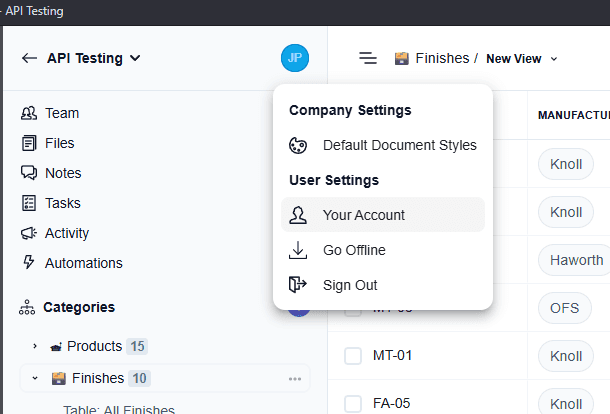
Your Layer API key. Find this under your account settings > API.
Your Layer project ID and category ID. Both are visible in your Layer URL:
https://app.layer.team/project/{projectId}/category/{categoryId}/...Your target “Rename” names for fields in a second spreadsheet (one column with current names, one with desired names, formatting for table is found near the end of this article, see sheet “RenameMap” just before Step 4).
Step 1: Pull Your Current Field List from Layer
This step connects Excel to the Layer API and loads your current field names and their IDs into the workbook.
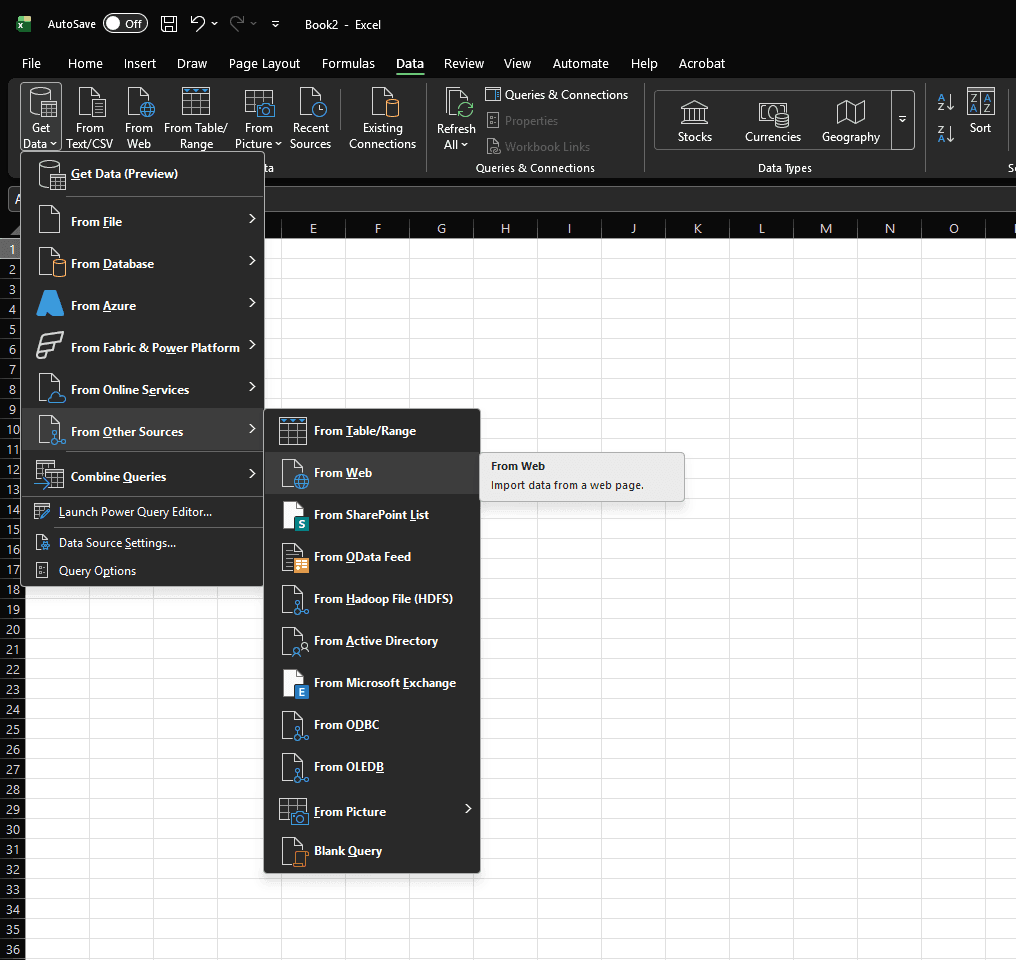
1: Open Excel and go to Data > Get Data > From Other Sources > From Web.
2. Select “Advanced”
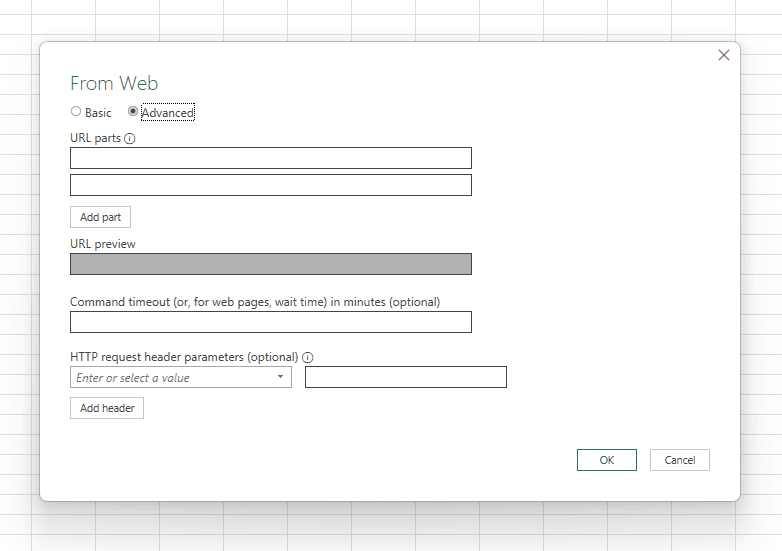
3. Enter the following URL in the first URL parts location, replacing {projectId} and {categoryId} with the IDs from your Layer URL:
4. Paste the Project ID and Category ID respectively to replace “{projectId}” and “{categoryId}” from step 3 above.
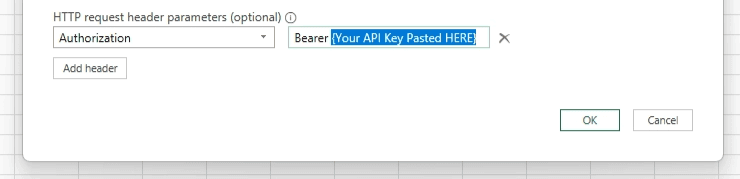
5. Fill in the two fields:
Key Name:
AuthorizationKey Value:
Bearerfollowed by your API key (include the space after "Bearer")
6. Find your API Key under your user profile settings.
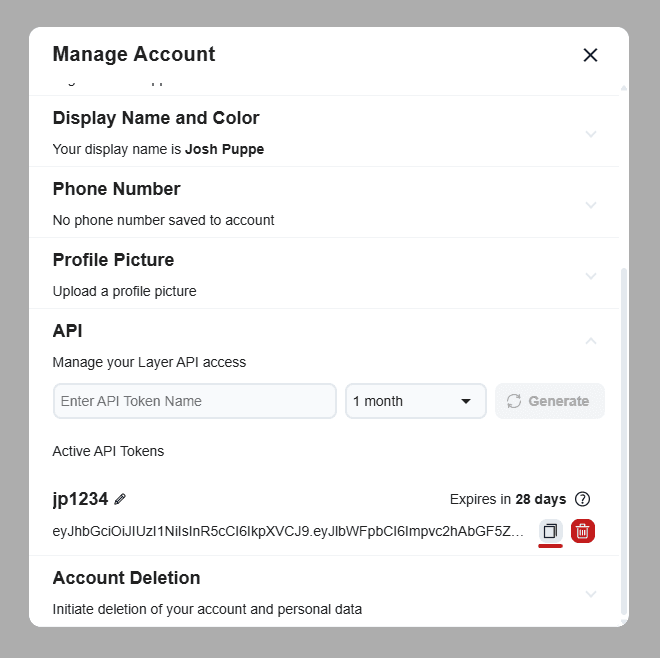
7. Paste your API Key. IMPORTANT: There should be a single space between “Bearer” and “Your Profile Key”
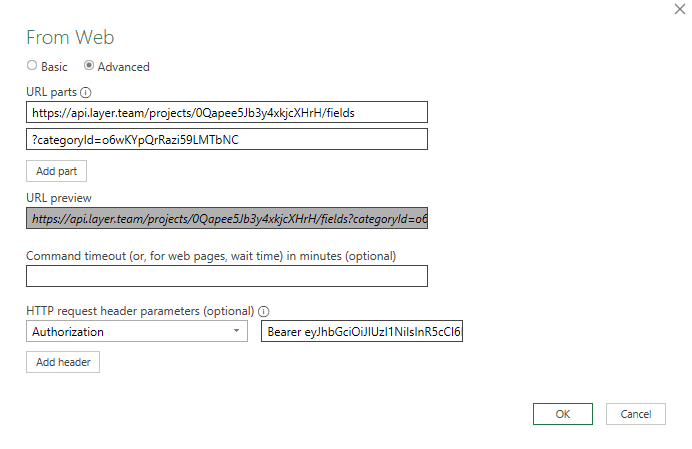
8. Press Ok.
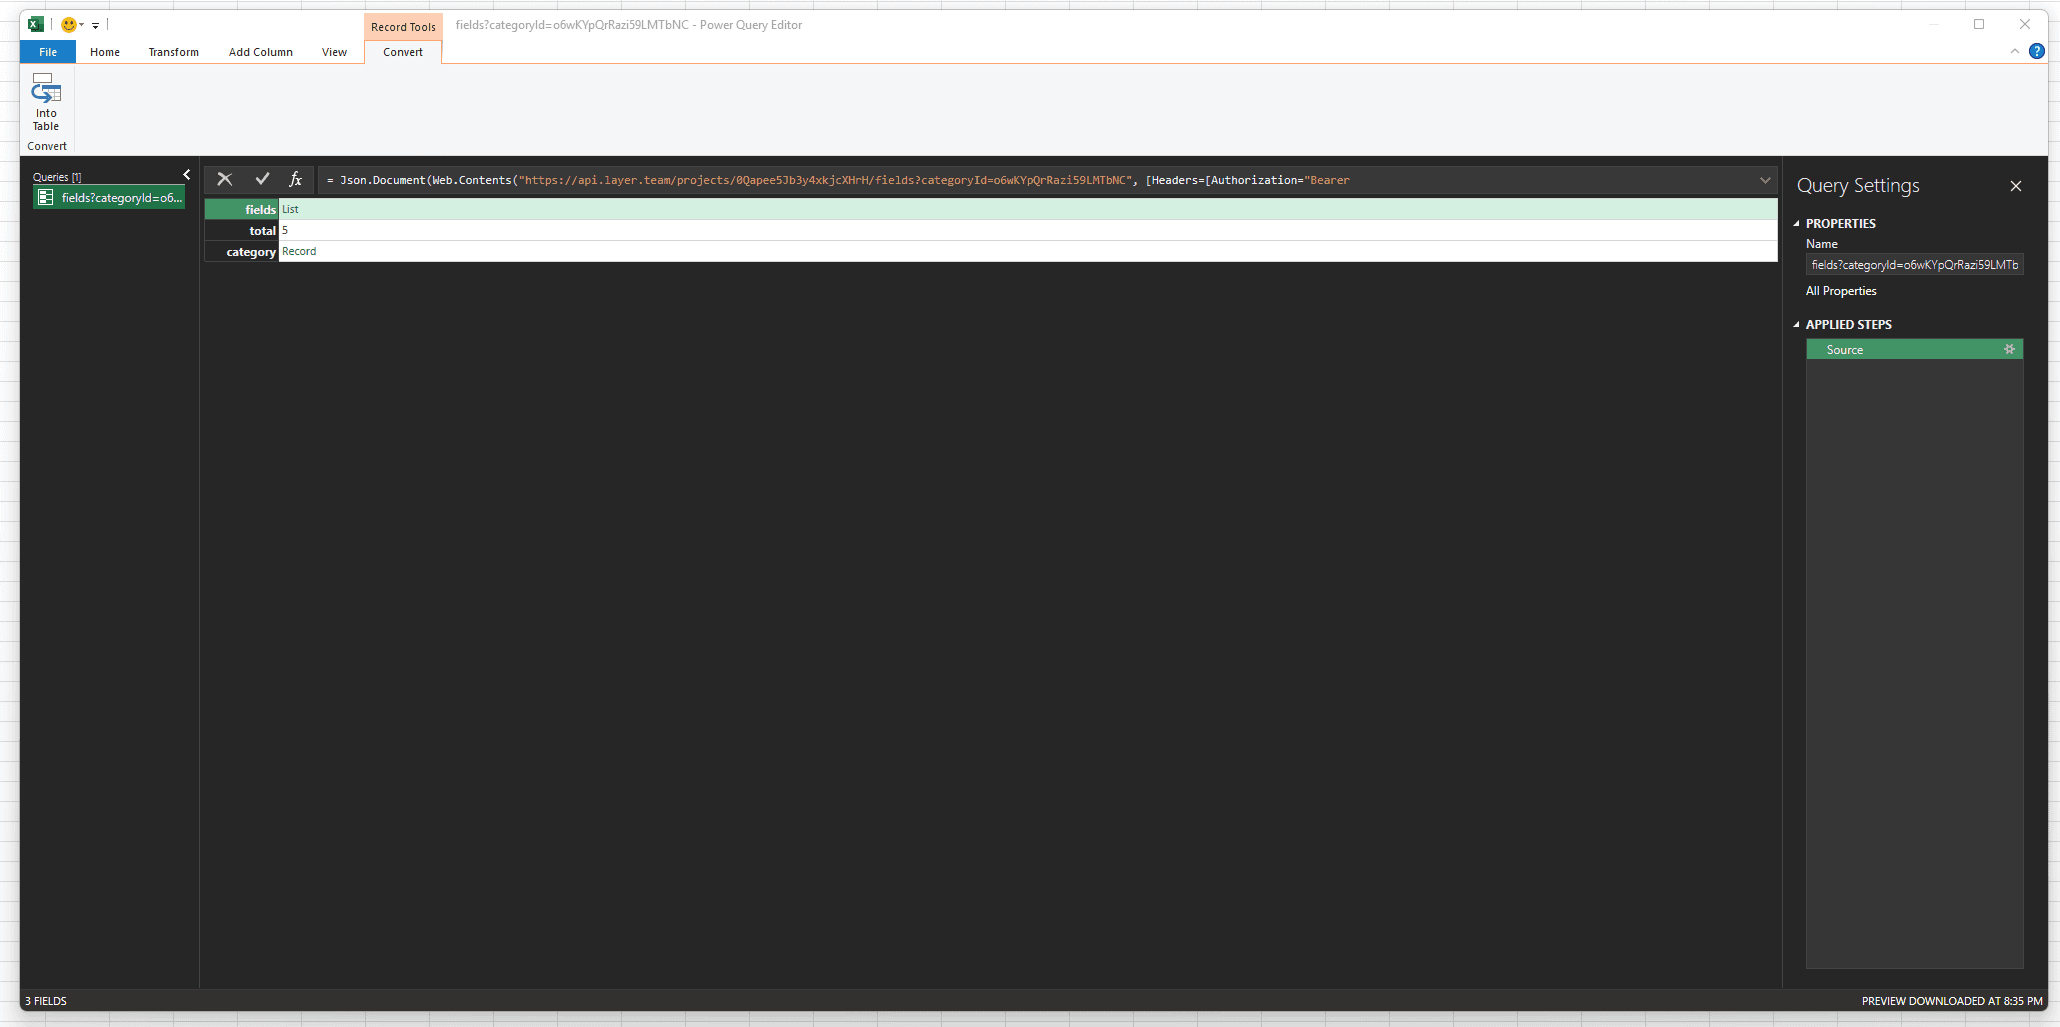
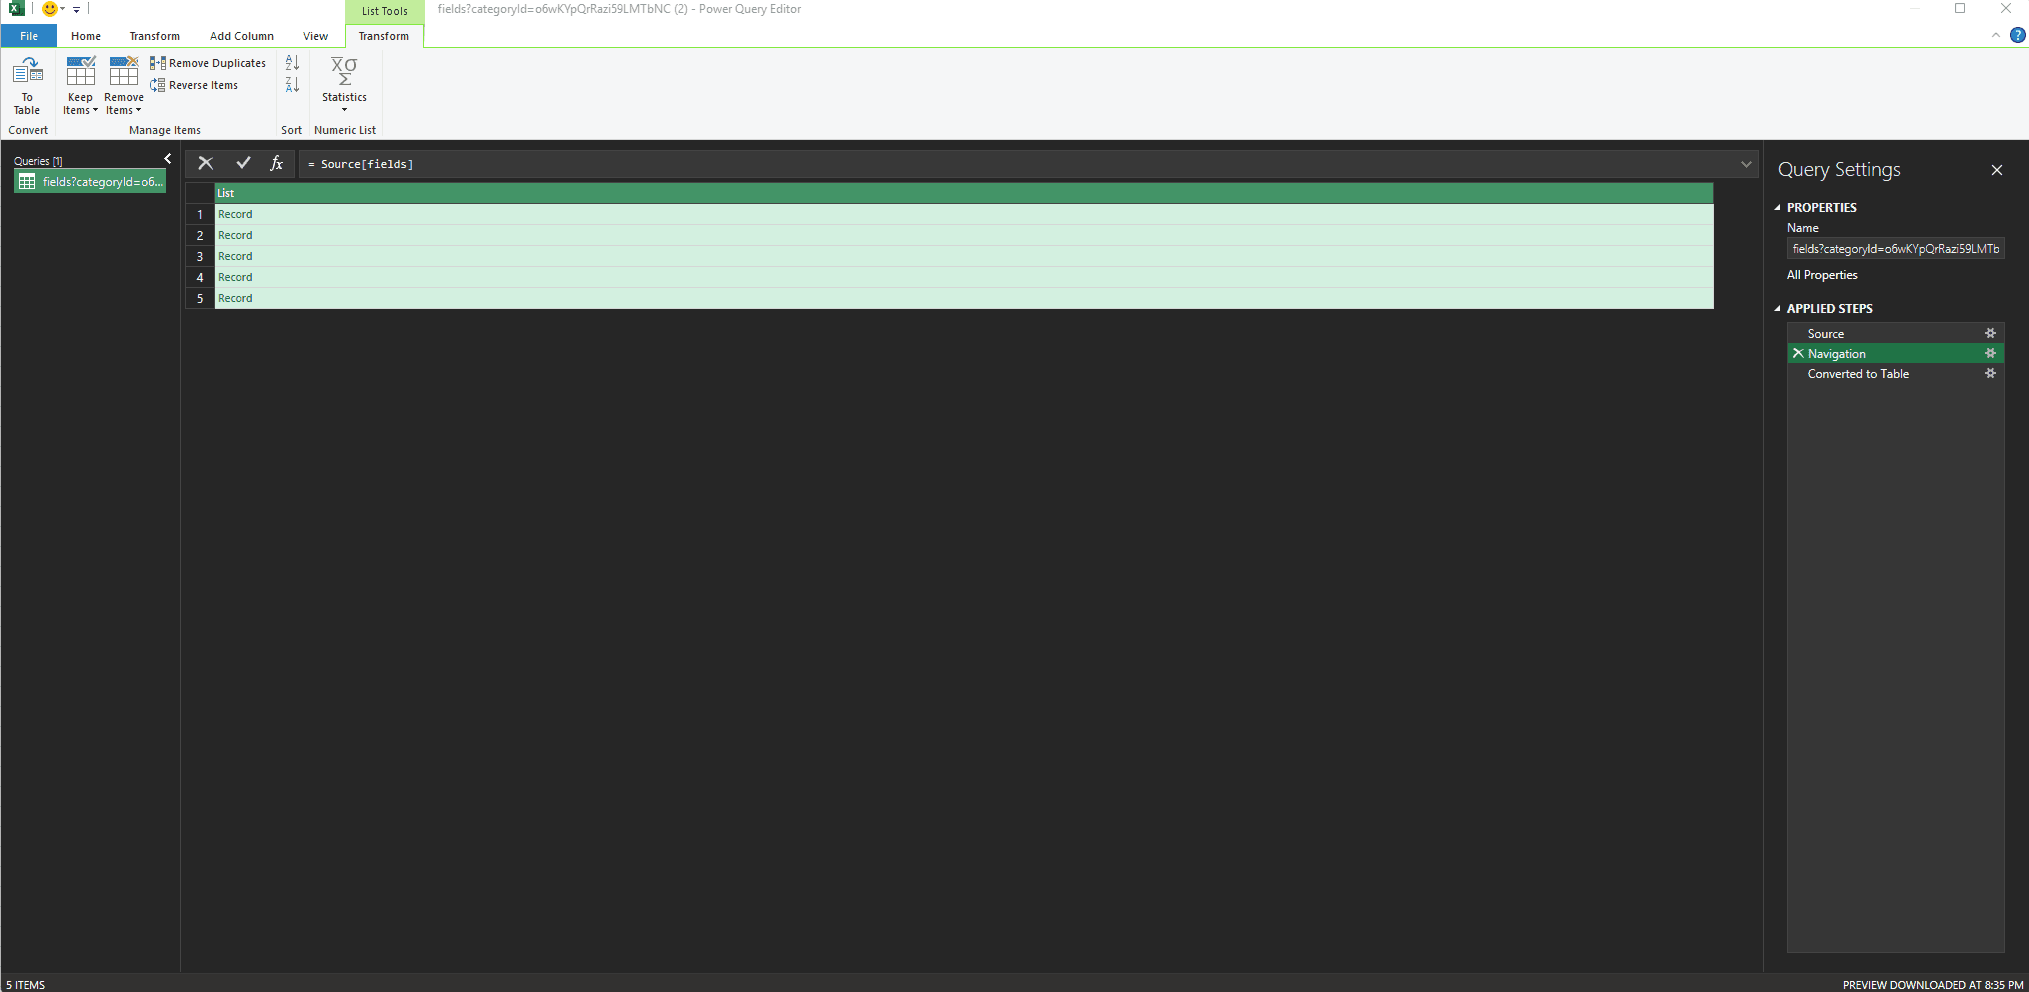
9. Double click on the list item in this table, as this is what we want to dive into to modify / replace with your Office Script. Note that every action taken in this interface for Record Tools will be tracked as an “Applied Step” to the right of the screen. If any mistaken action is taken you can always revert the information to a previous step!
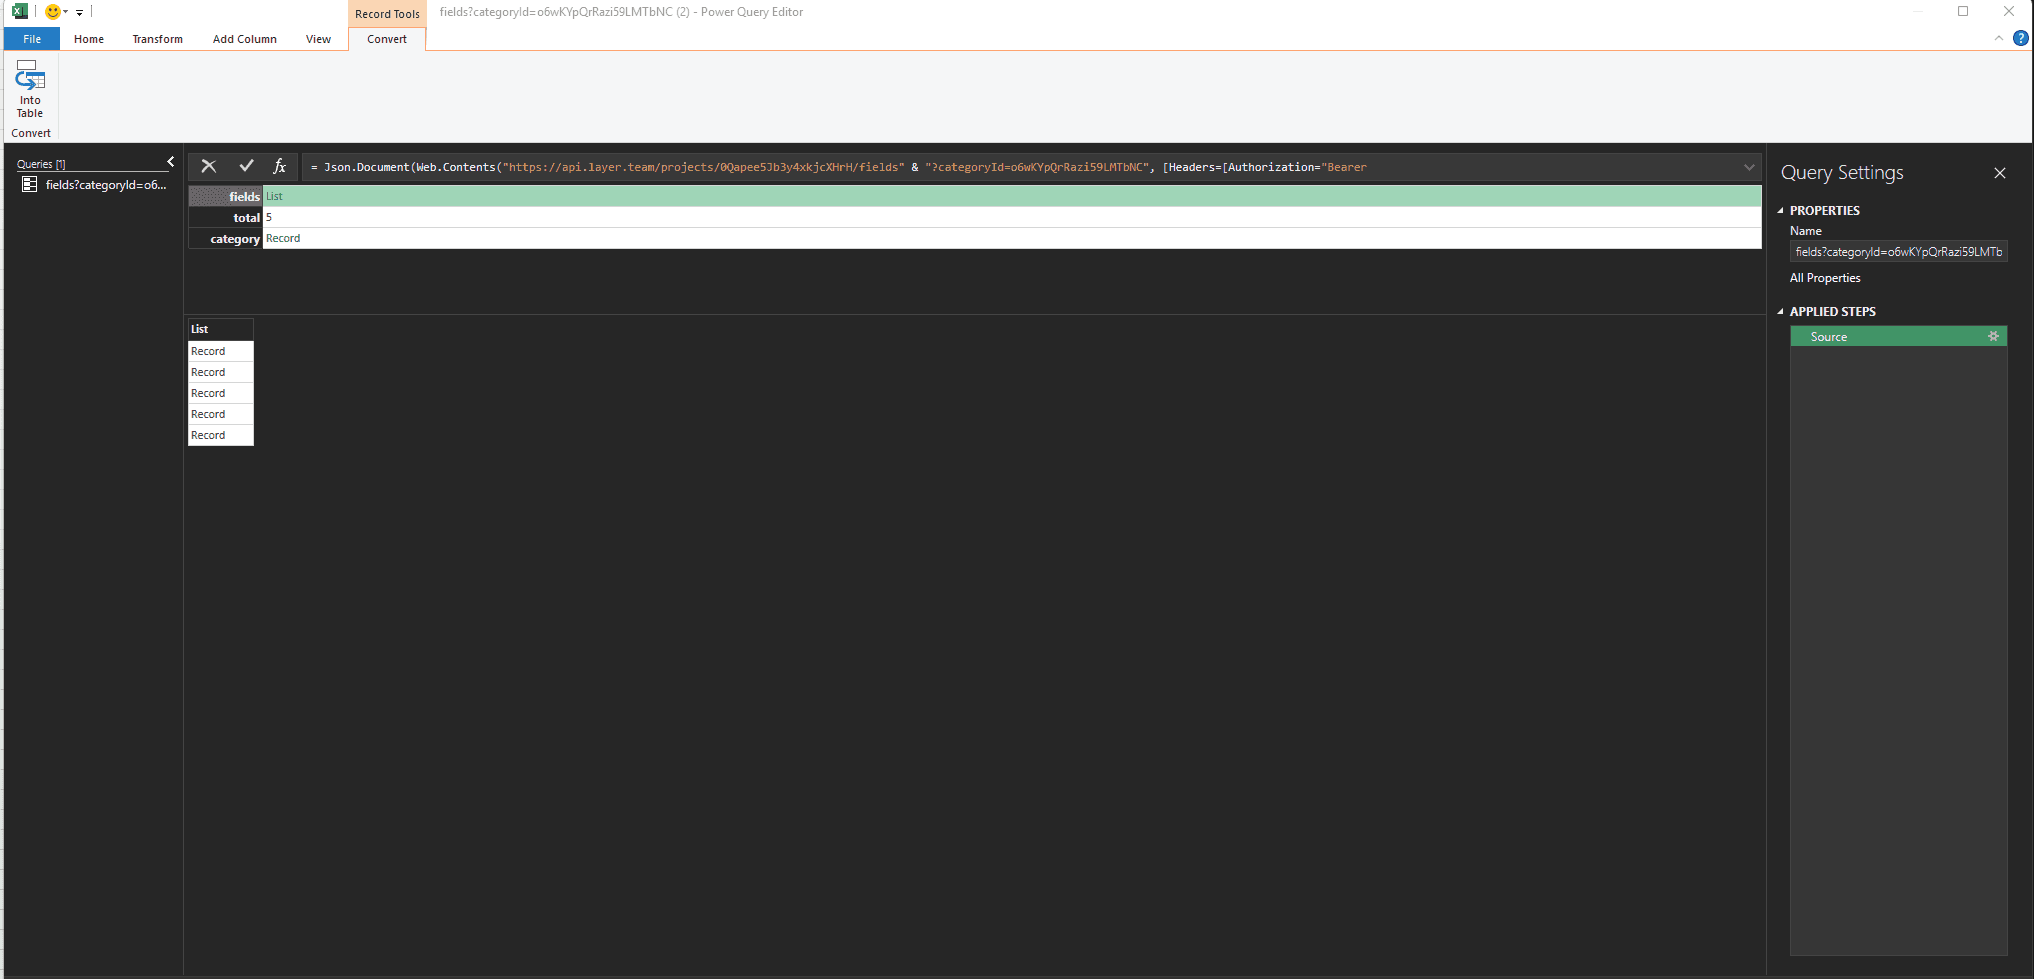
10. The list of fields that exist in the Category that you referenced with your CategoryID will show here as a Record for each existing field within. With fields List highlighted, and your List of records showing.
11. Click “Into Table” upper left button. It is OK that this says “Record.” We will dive deeper.
12. Select “Ok”
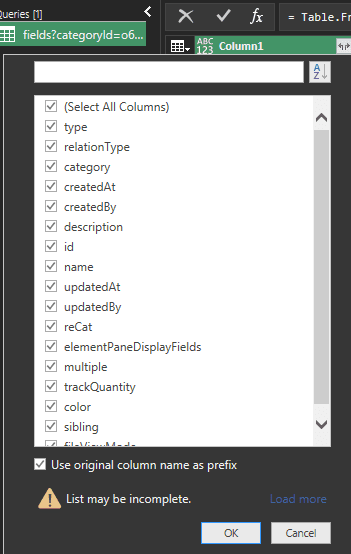
13. Press the small dual arrow button to expand all visible data in the Record Column
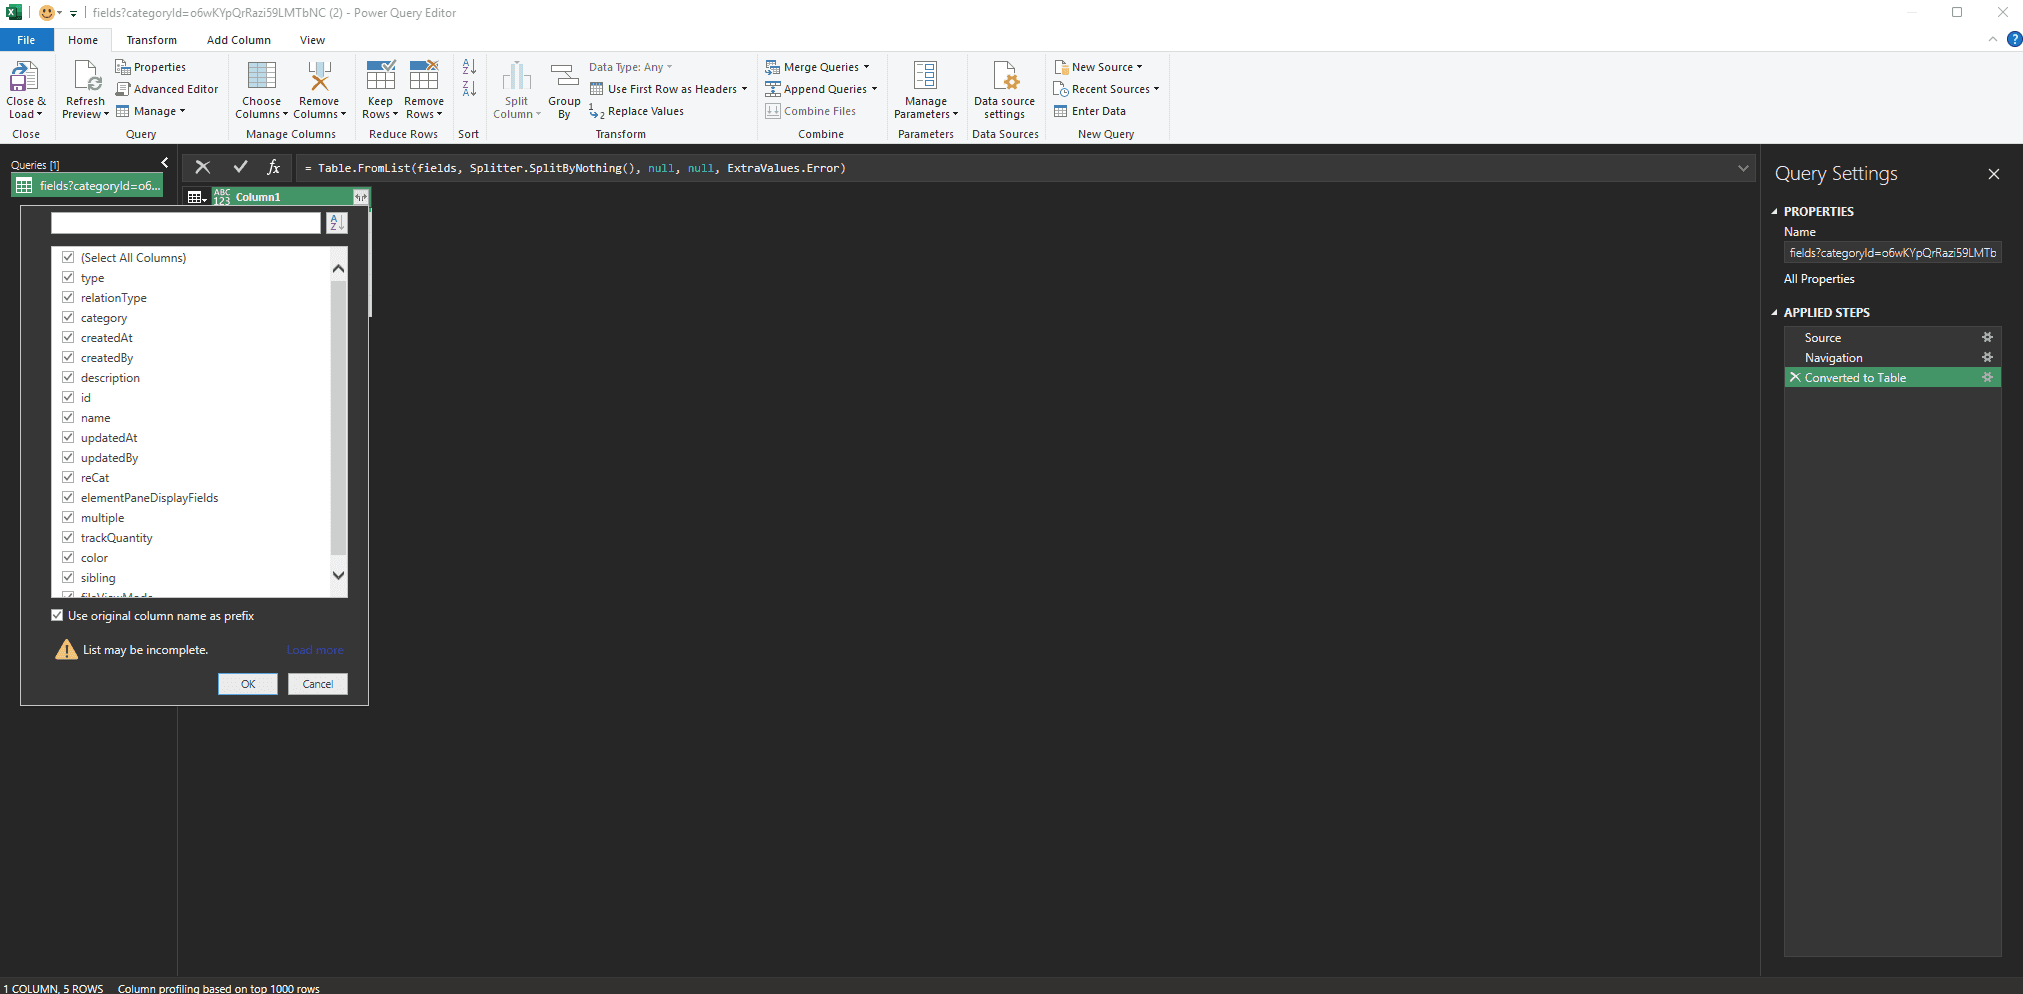
14. This dropdown appears with all available fields. Go ahead click the (Select All Columns) button to unselect all, then select just the ID and Name. The resulting data will be the ID and the Name of your Fields within the Category of the CategoryID you provided earlier. We want to isolate these to their own table, to match with a renaming table to feed our Office Scripts, which will automate the process of overwriting the Field names by matching ID and referencing a new table we will create.
15. Hit OK.
16. Select Close & Load if the list matches the existing Fields you’d like to rename.
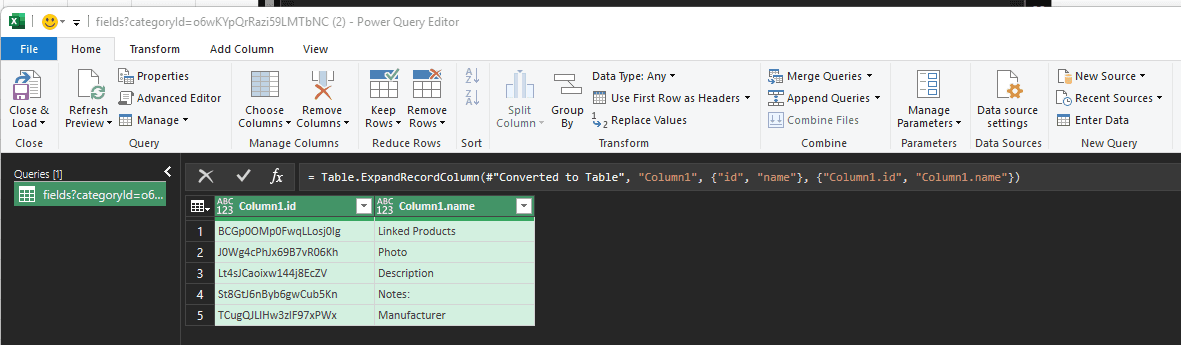
17. Power Query will load the API response. You will see a table of records. Click Close & Load to bring this into your workbook as a table.
Step 2: Build Your Rename Map
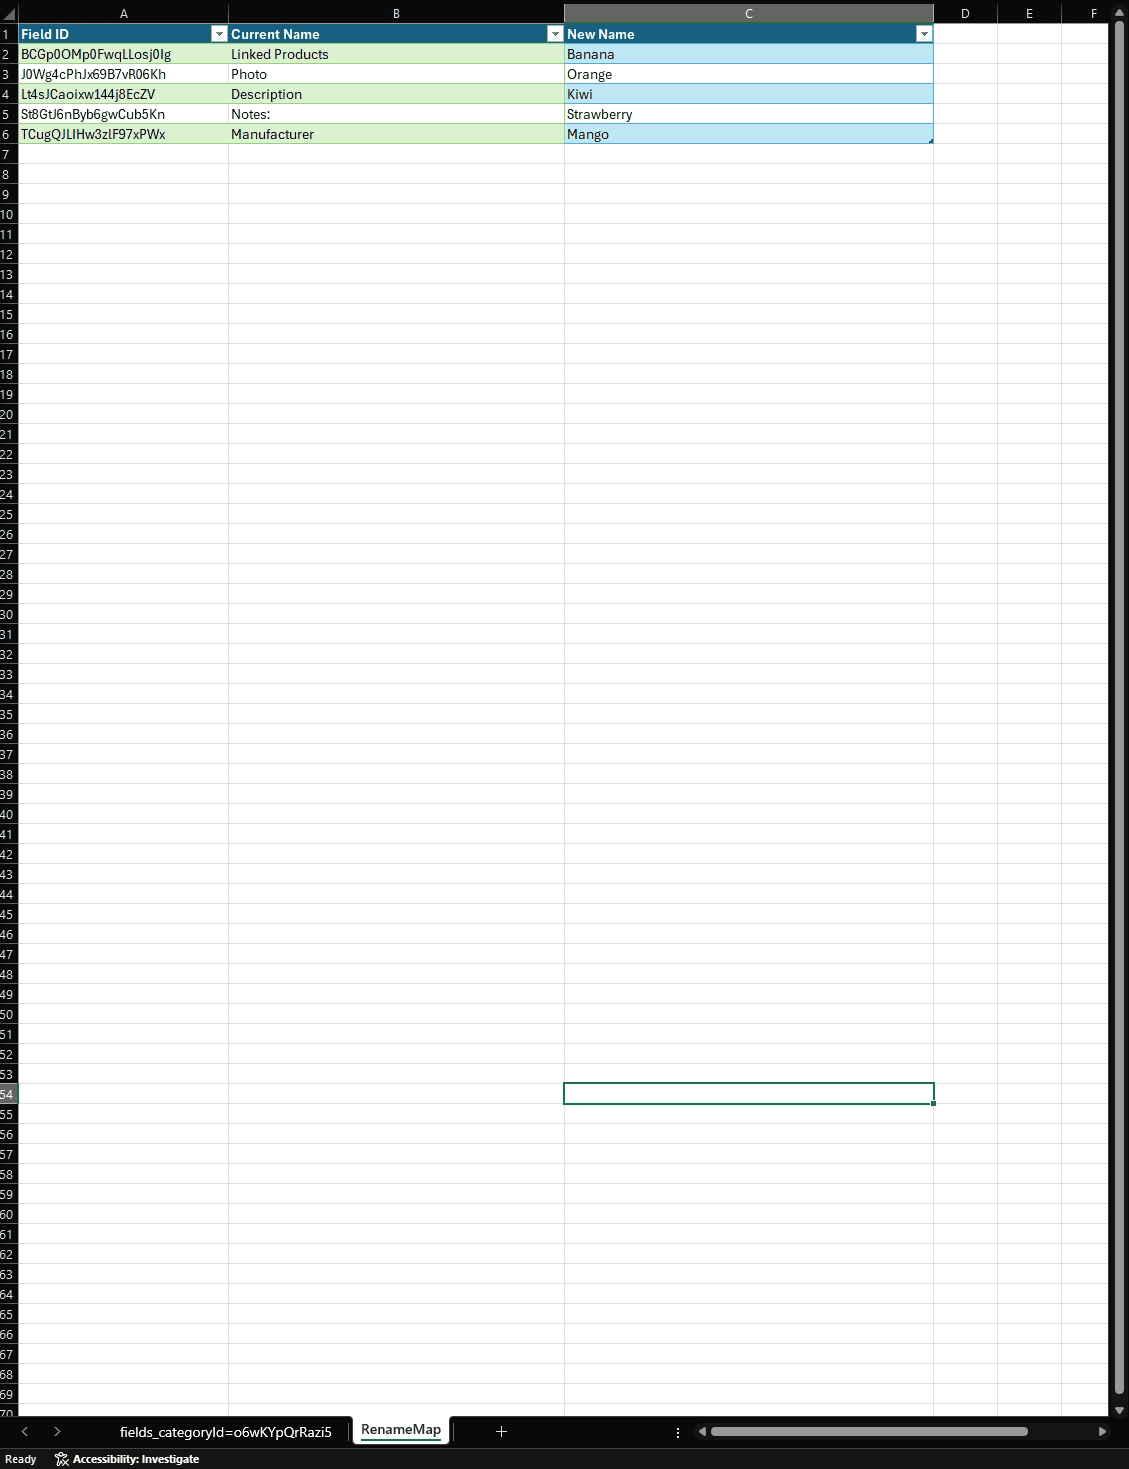
You now have a table of current field IDs and names pulled in your workbook. In a separate sheet, build a rename table like this table from my example project:
Field ID | Current Field Name | New Name |
|---|---|---|
BCGp0OMp0FwqLLosj0Ig | Linked Products | Banana |
J0Wg4cPhJx69B7vR06Kh | Photo | Orange |
Lt4sJCaoixw144j8EcZV | Description | Kiwi |
St8GtJ6nByb6gwCub5Kn | Notes: | Strawberry |
TCugQJLIHw3zlF97xPWx | Manufacturer | Mango |
Paste the field IDs and current names from the loaded table, then fill in the New Name column from your source spreadsheet.
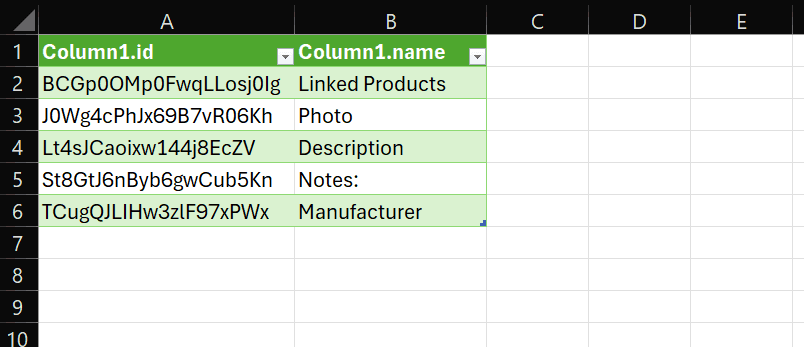
Your original sheet will look like this:
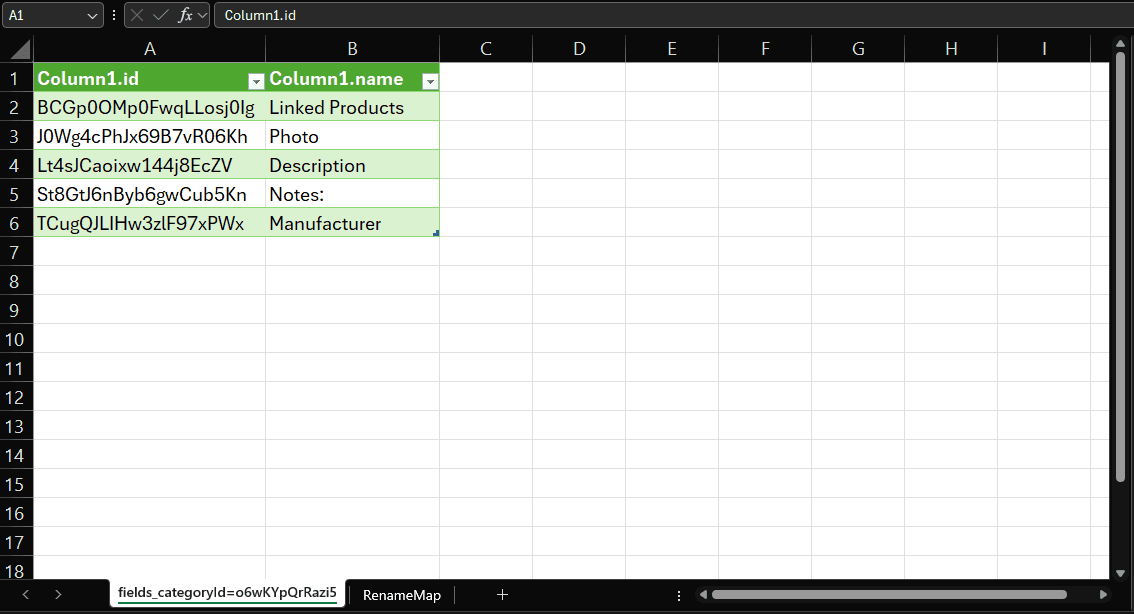
Make a second sheet and name it “RenameMap” ← IMPORTANT
Office Scripts will pull this name, it MUST match.
Step 3: Send the Rename Requests from Excel
Excel's Power Query loads data but does not send write requests on its own. To send the rename requests, use Excel's built-in Office Scripts (Windows) or a Macro to loop through your rename table and call the Layer API for each row.
Go to Automate > New Script in the Excel ribbon.
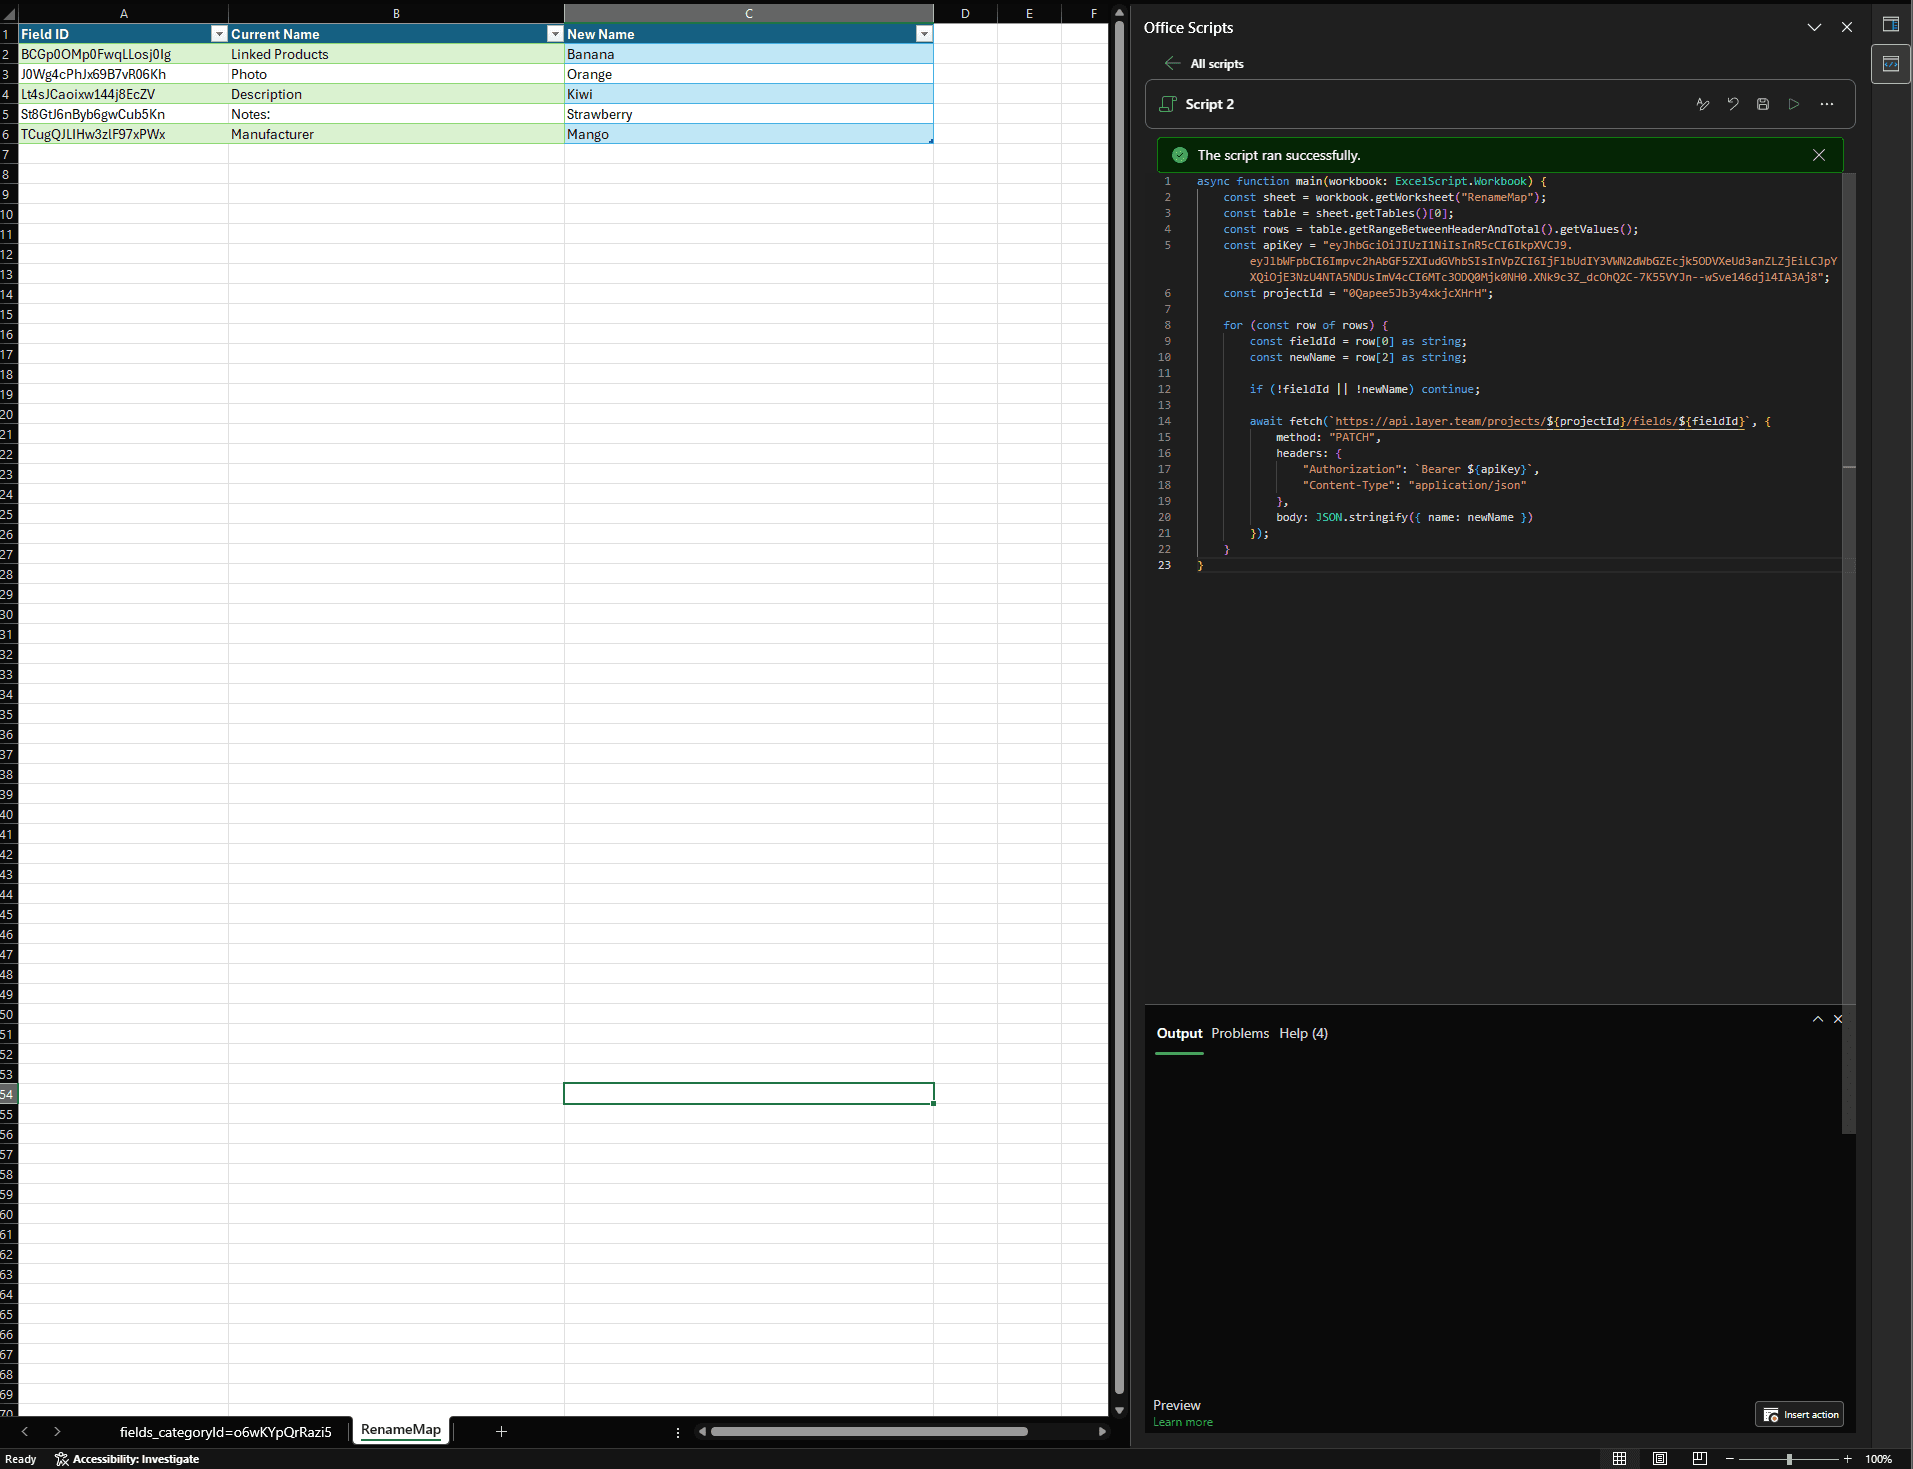
Paste the following script, which reads your rename table and sends a PATCH request for each row:
Replace
YOUR_API_KEY_HEREwith your Layer API key.Adjust the column indices if your table layout differs (0 = Field ID, 2 = New Name). If this is just a simple Name rename, you will only have these two column.
Click Run. The script will loop through each row and rename the corresponding field in Layer.
When filled in properly, it should look like this in Office Scripts (In this case, I used my own project example, this is just to show proper syntax after replacing your API and project Ids:
Press the Run button to run your script.
Step 4: Verify
Once the script has finished running, go back to your Power Query connection and click Data > Refresh All. The name column in your loaded field table should now reflect the updated names. You can also reload the category in Layer to confirm.
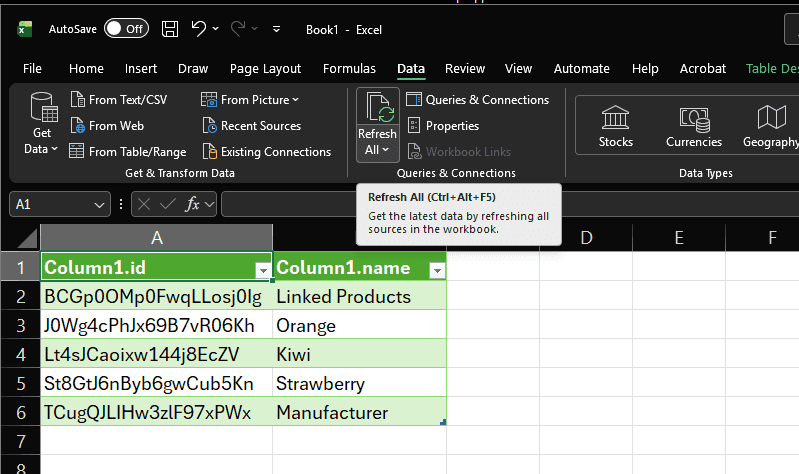
In my Test API Layer Project, my Fields have now been remapped to what was shown in my "RenameMap”
The Fields maintain their original IDs, these were used as the hooks to Rename Map in the first place, and are the “source of truth” for each of the field identities.

Notes
Renaming a field does not affect existing data stored in that field.
Field
idvalues do not change when a field is renamed.Office Scripts require a Microsoft 365 subscription. If you are on an older version of Excel, the macro approach using VBA is an alternative. Contact your IT team or Layer support for assistance.
