Learn how to publish your Revit model to a Layer project, and get started connecting data

Zach Soflin
Models can be published using the Revit Add-In or by uploading a .rvt file directly into the Layer app. Both methods achieve the same goal of bringing Revit categories and elements into Layer.
💡 Publishing also brings your Revit views and sheets into Layer. Once published, these are available to select when creating a Model View, letting you visualize and interact with your data in the context of a specific sheet or view, without needing to attach a PDF.
Revit views and sheets published into Layer for use inside Model Views.
📁 Layer supports models up to 5GB, but larger models increase processing time. Learn how to reduce your model size here.
Steps
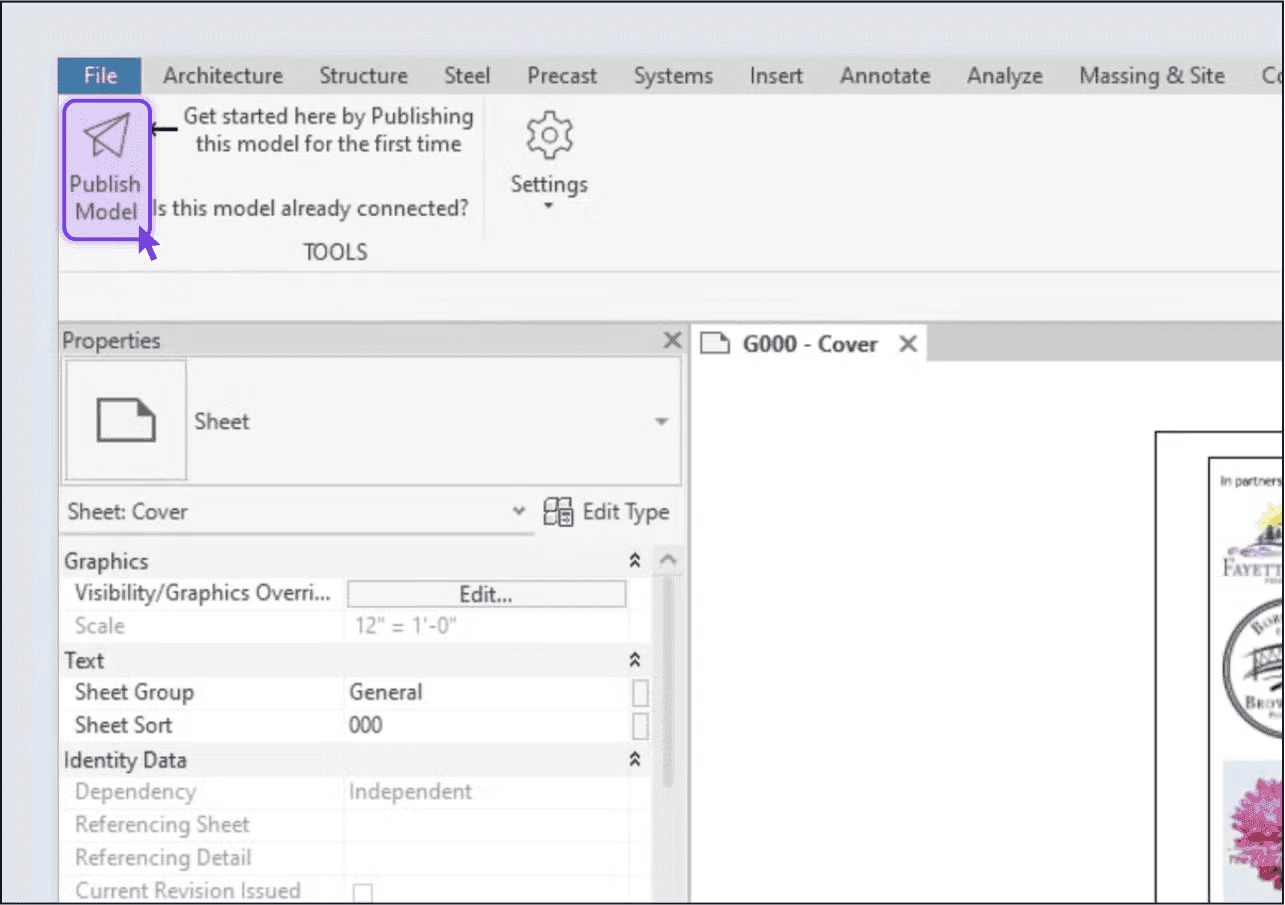
Publish from the Revit Add-In

The Publish Model panel in the Revit add-in for sending the active model to Layer.
Download and install the Revit Add-In.
Open a model in Revit.
Select the LAYER tab in your project ribbon and sign into the Add-In.
Once signed in, click Publish Model in your LAYER ribbon. Publishing can take several minutes while the model files upload.
After publishing, a panel opens in Revit allowing you to select a project and name the version. Best practice: include a date or version indicator (e.g., “75% DD”).
If it’s a new model, select Create a new model. If updating an existing one, choose it from the dropdown.
Click Publish Models Now → to begin processing. Depending on model size and complexity, this can take several minutes or up to an hour. You’ll receive an email when it’s done.
Once published, open the Layer Web App to view and manage your model.
Publish from the Layer App

The Models menu inside the Layer web app, used to upload a .rvt file directly.
Within a project, click the
+next to the Models header in the left navigation.Select Upload a Model Manually to Layer.
Choose the
.rvtfile from your computer.To include linked models, check Include models that are linked to this one.
Click Continue → after uploading your
.rvtfiles.On the next page, rename the version (best practice: include date or progress level).
If it’s a new model, choose Create a new model. For updates, select an existing model from the dropdown.
Click Publish Models Now → to begin processing. This can take several minutes or up to an hour depending on size and complexity. You’ll receive an email notification when processing is complete.
