Learn how to create, edit, and manage fields in Layer. Customize field types, names, descriptions, and highlight colors to organize your data within the Element Detail Pane.

Zach Soflin
Create new field
When you create a field, it is added for the entire category, encompassing all the elements in the Category.
To create a new field, press the + button to the right of your fields bar.
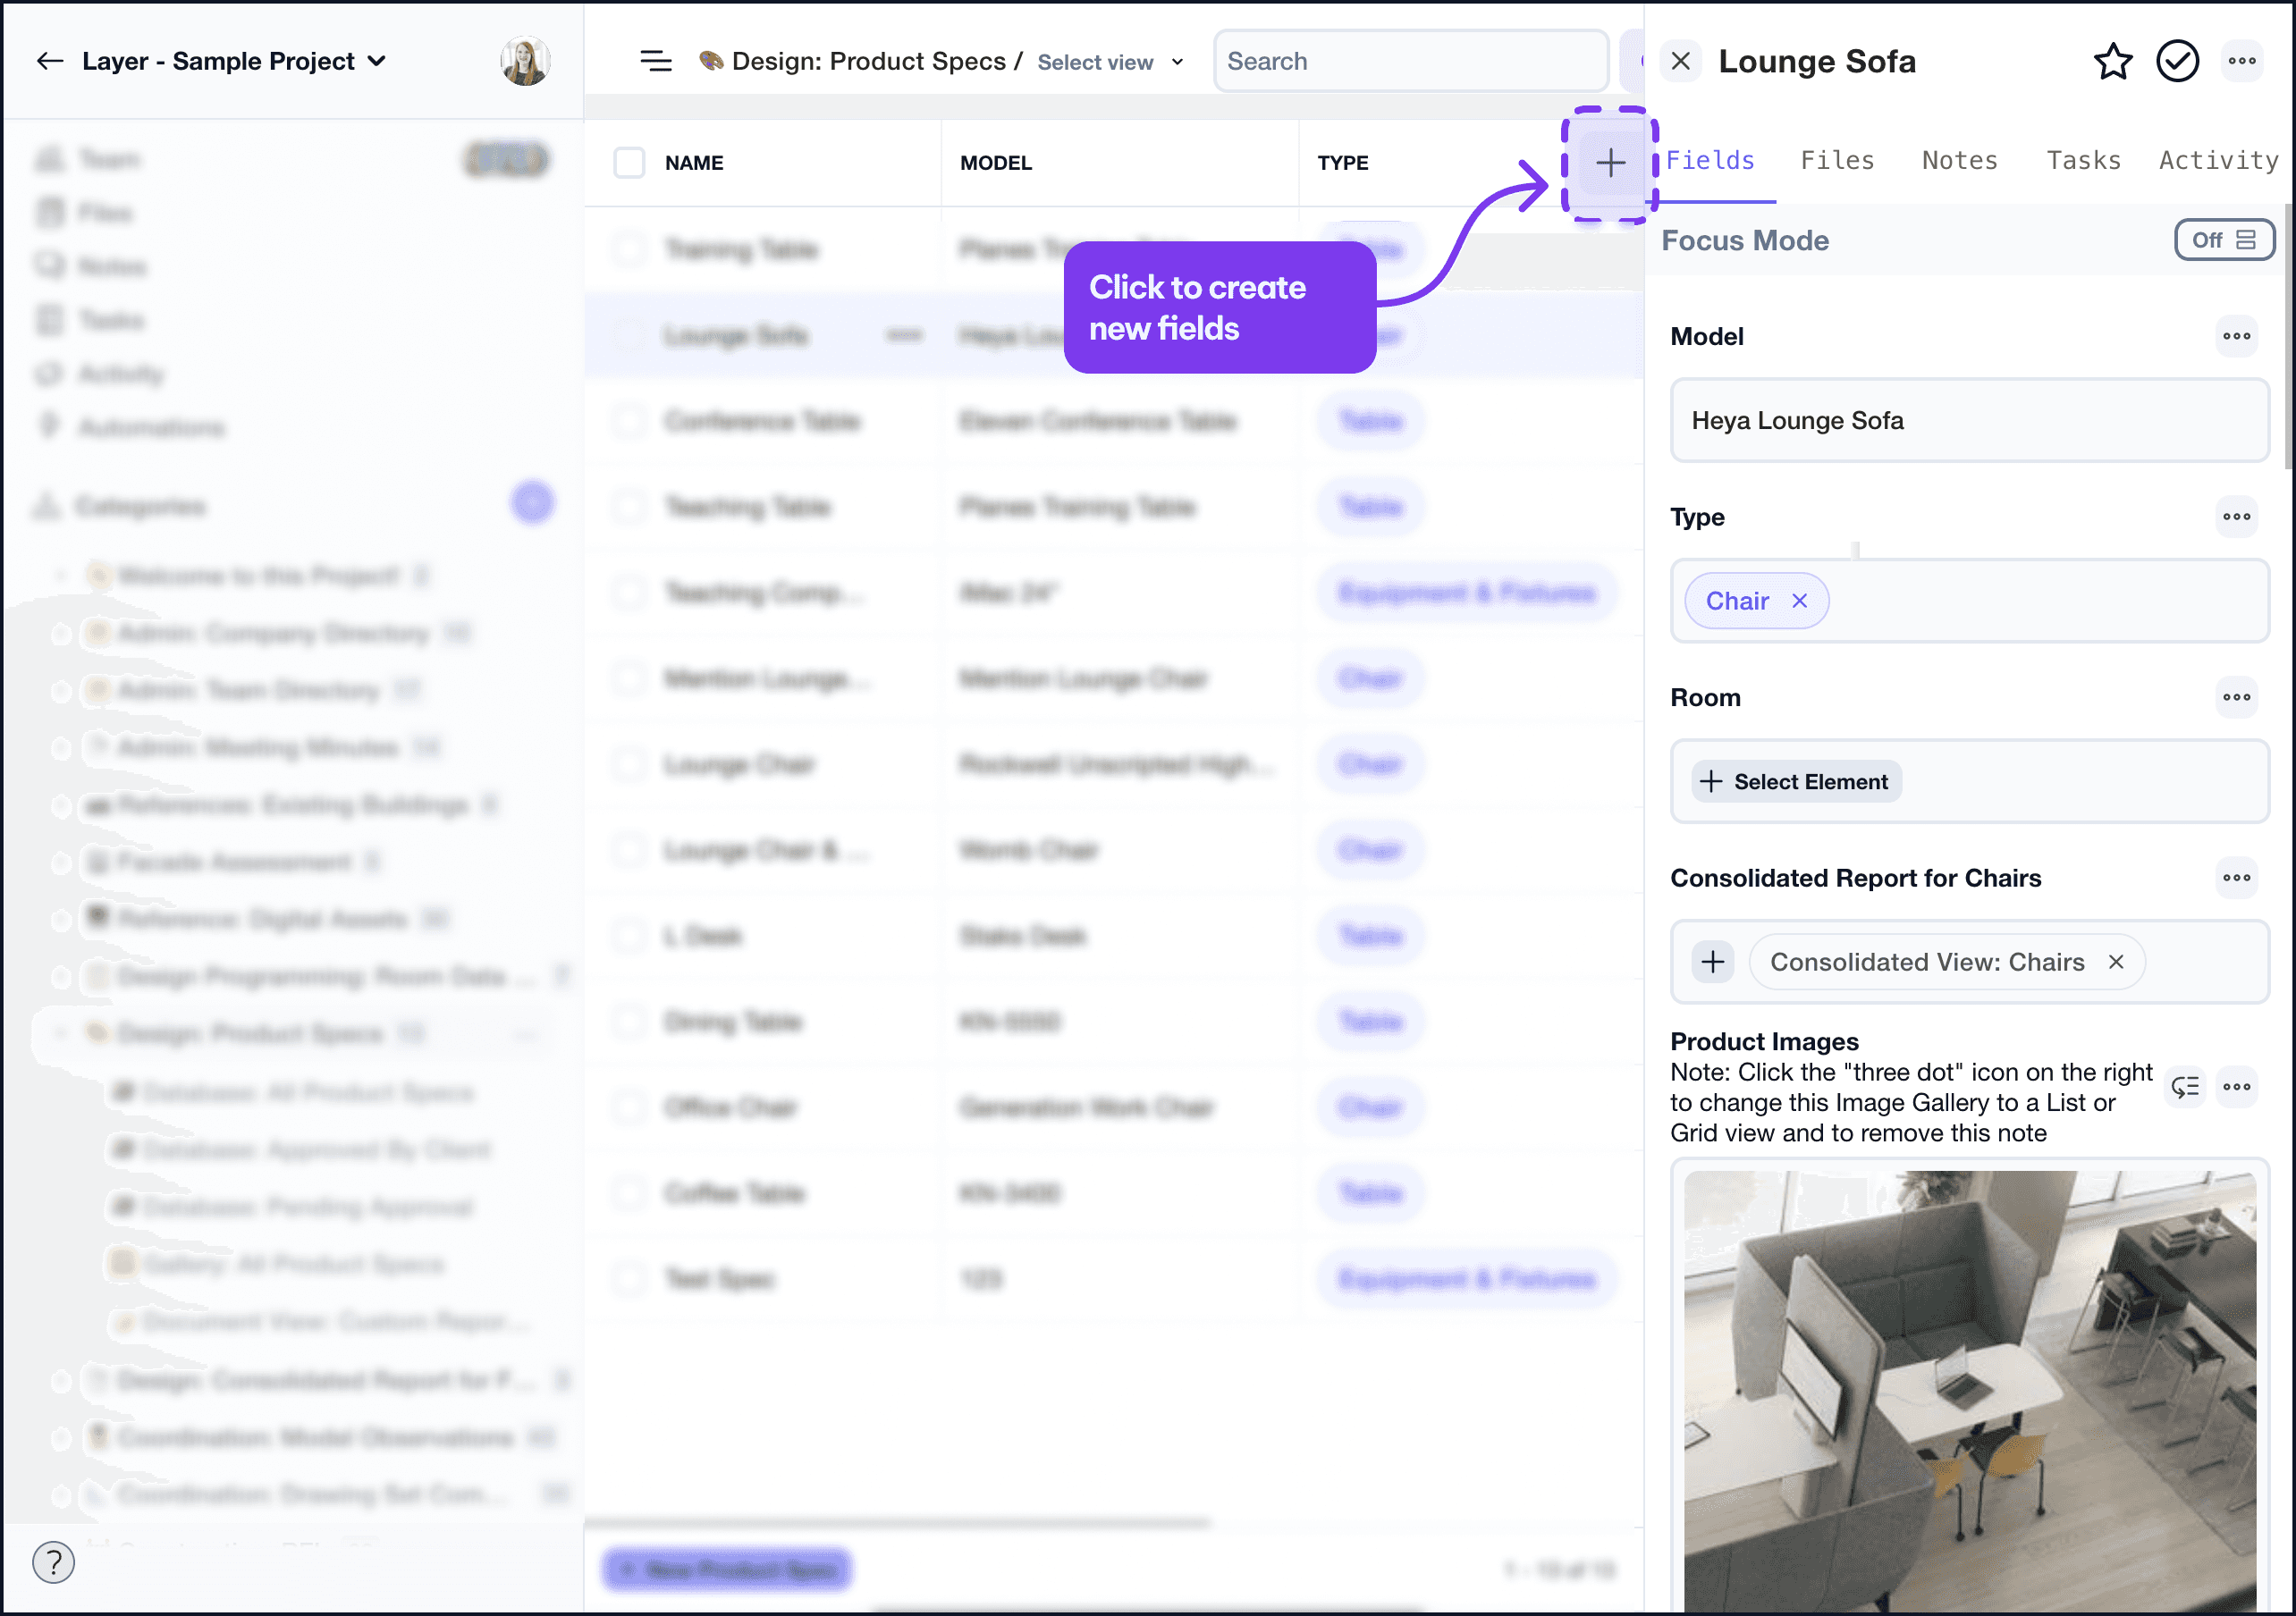
The + button on the fields bar used to create a new field on a category.
Or you can choose to Edit Fields from the Element Detail Pane.
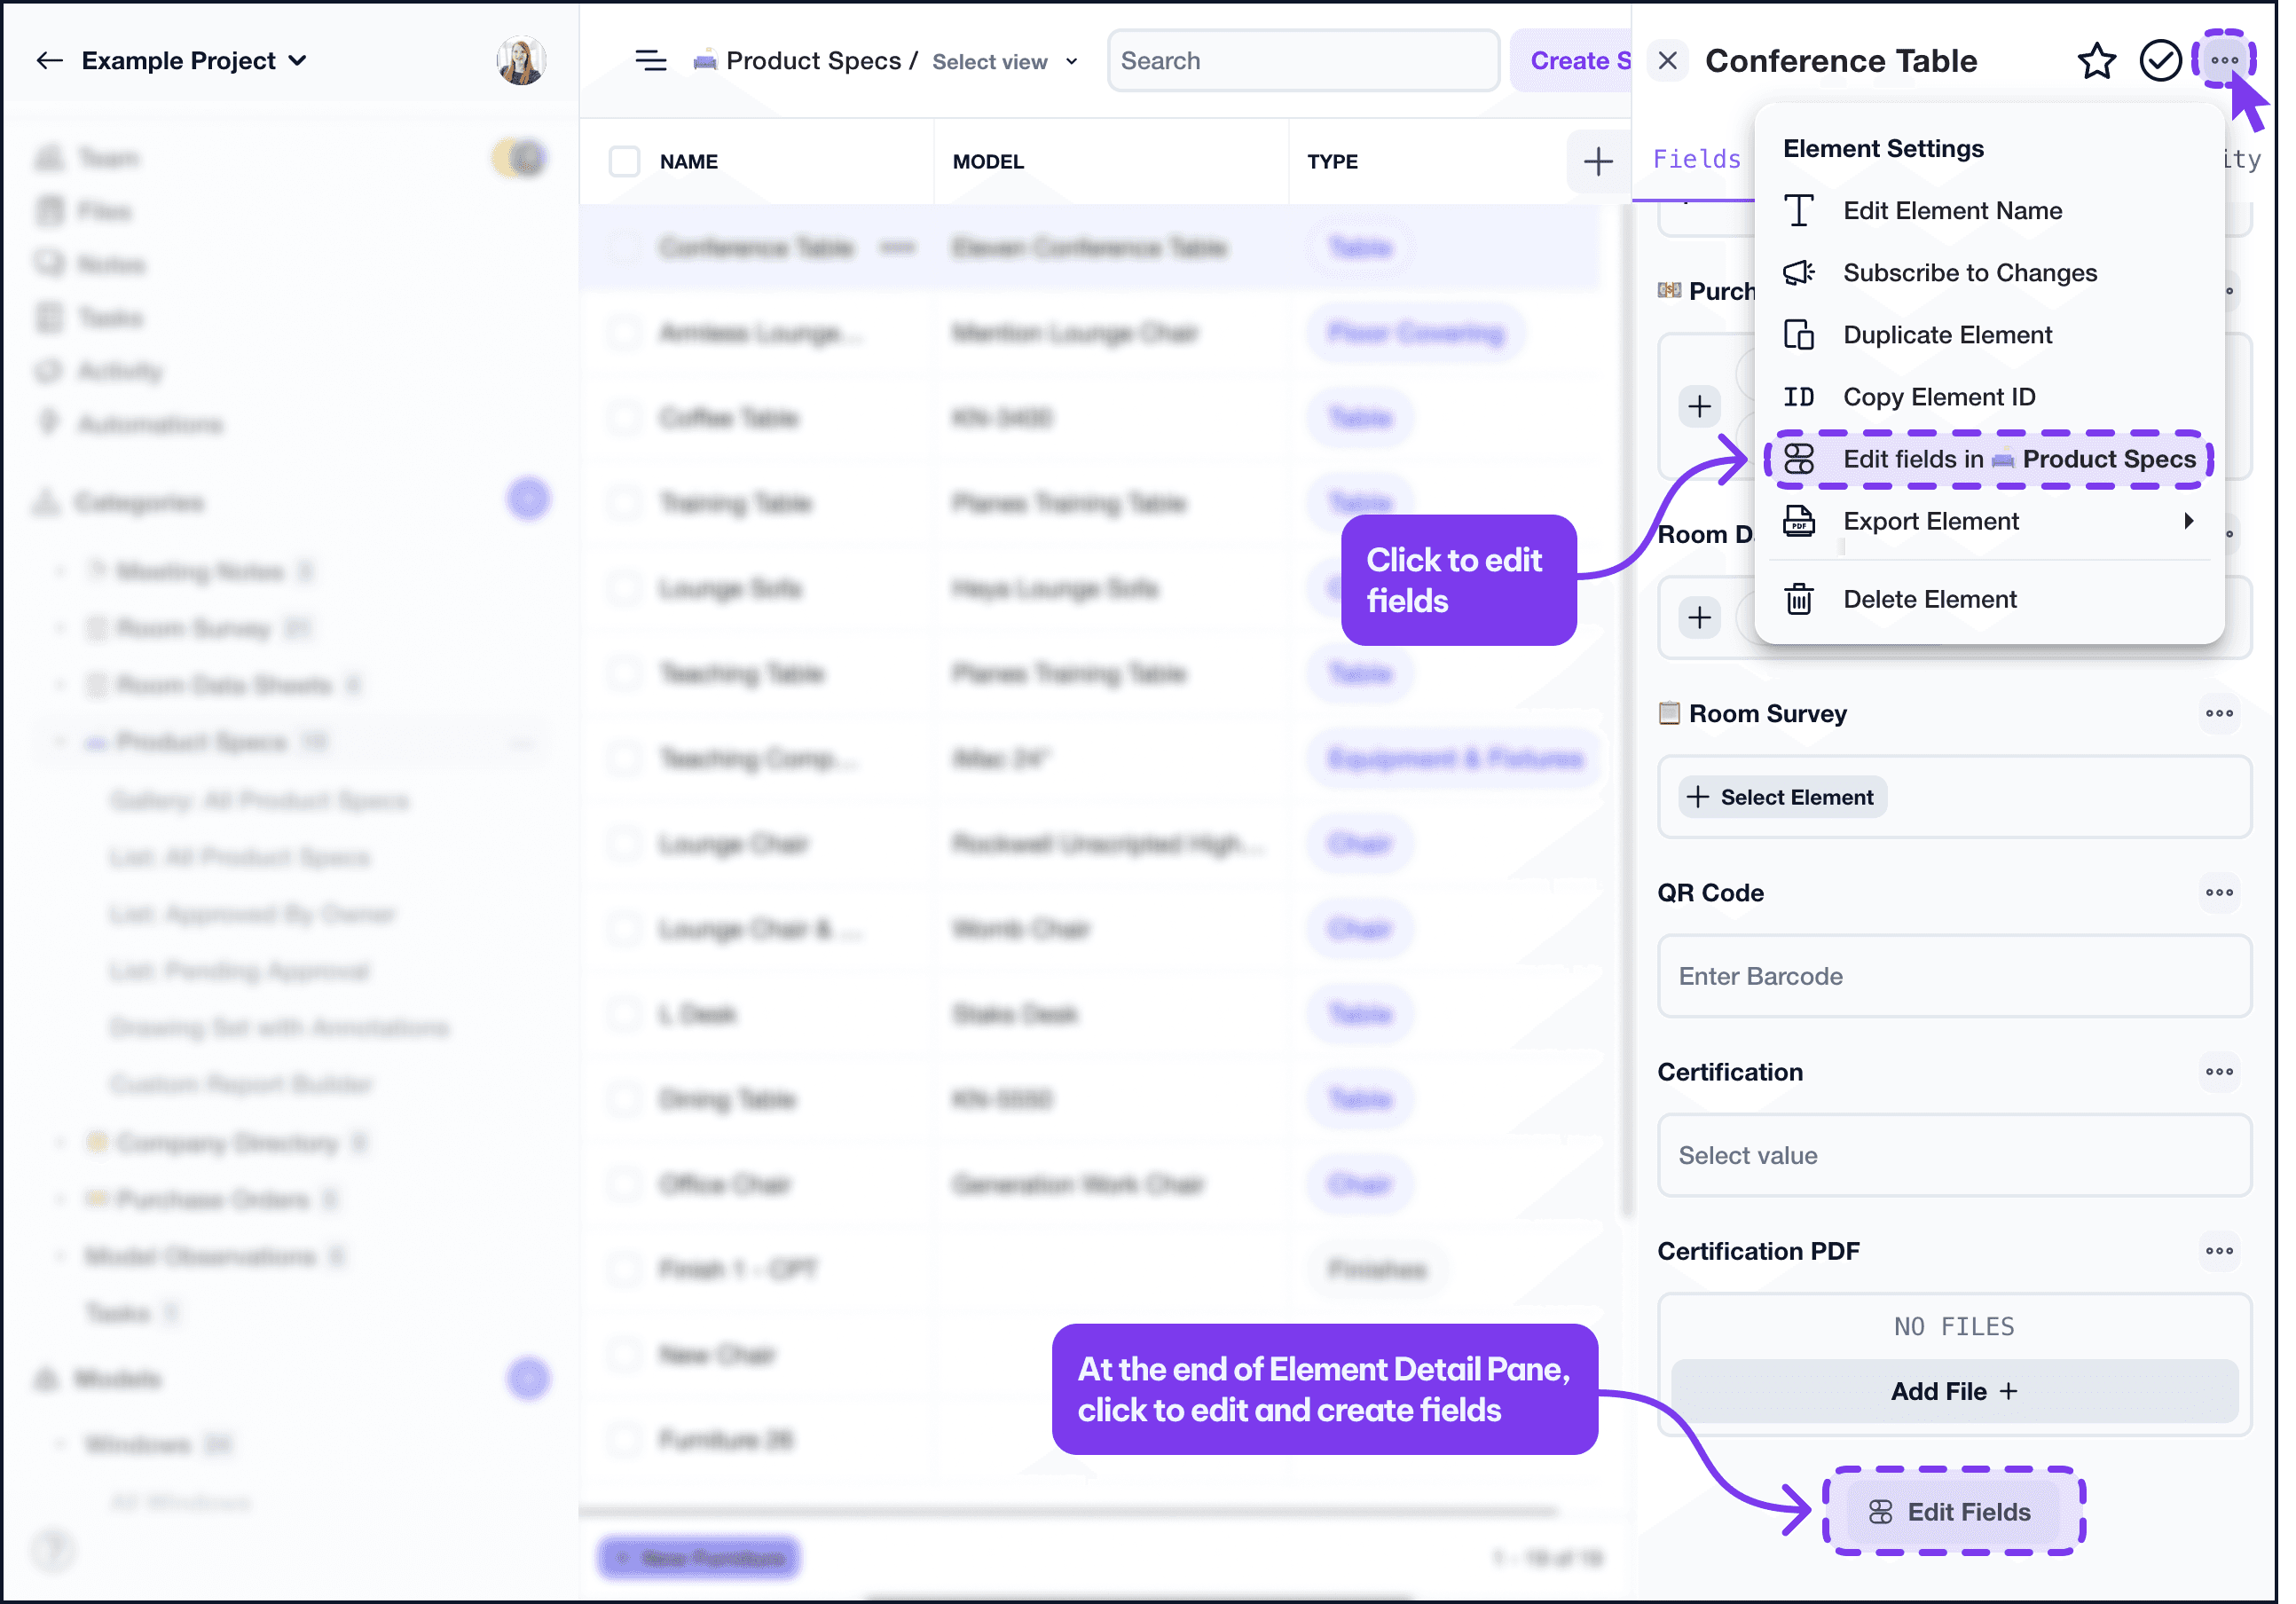
The Edit Fields entry point from the Element Detail Pane.
Select your field type you want to use from the menu. Not sure what field to use? See Layer Field Types
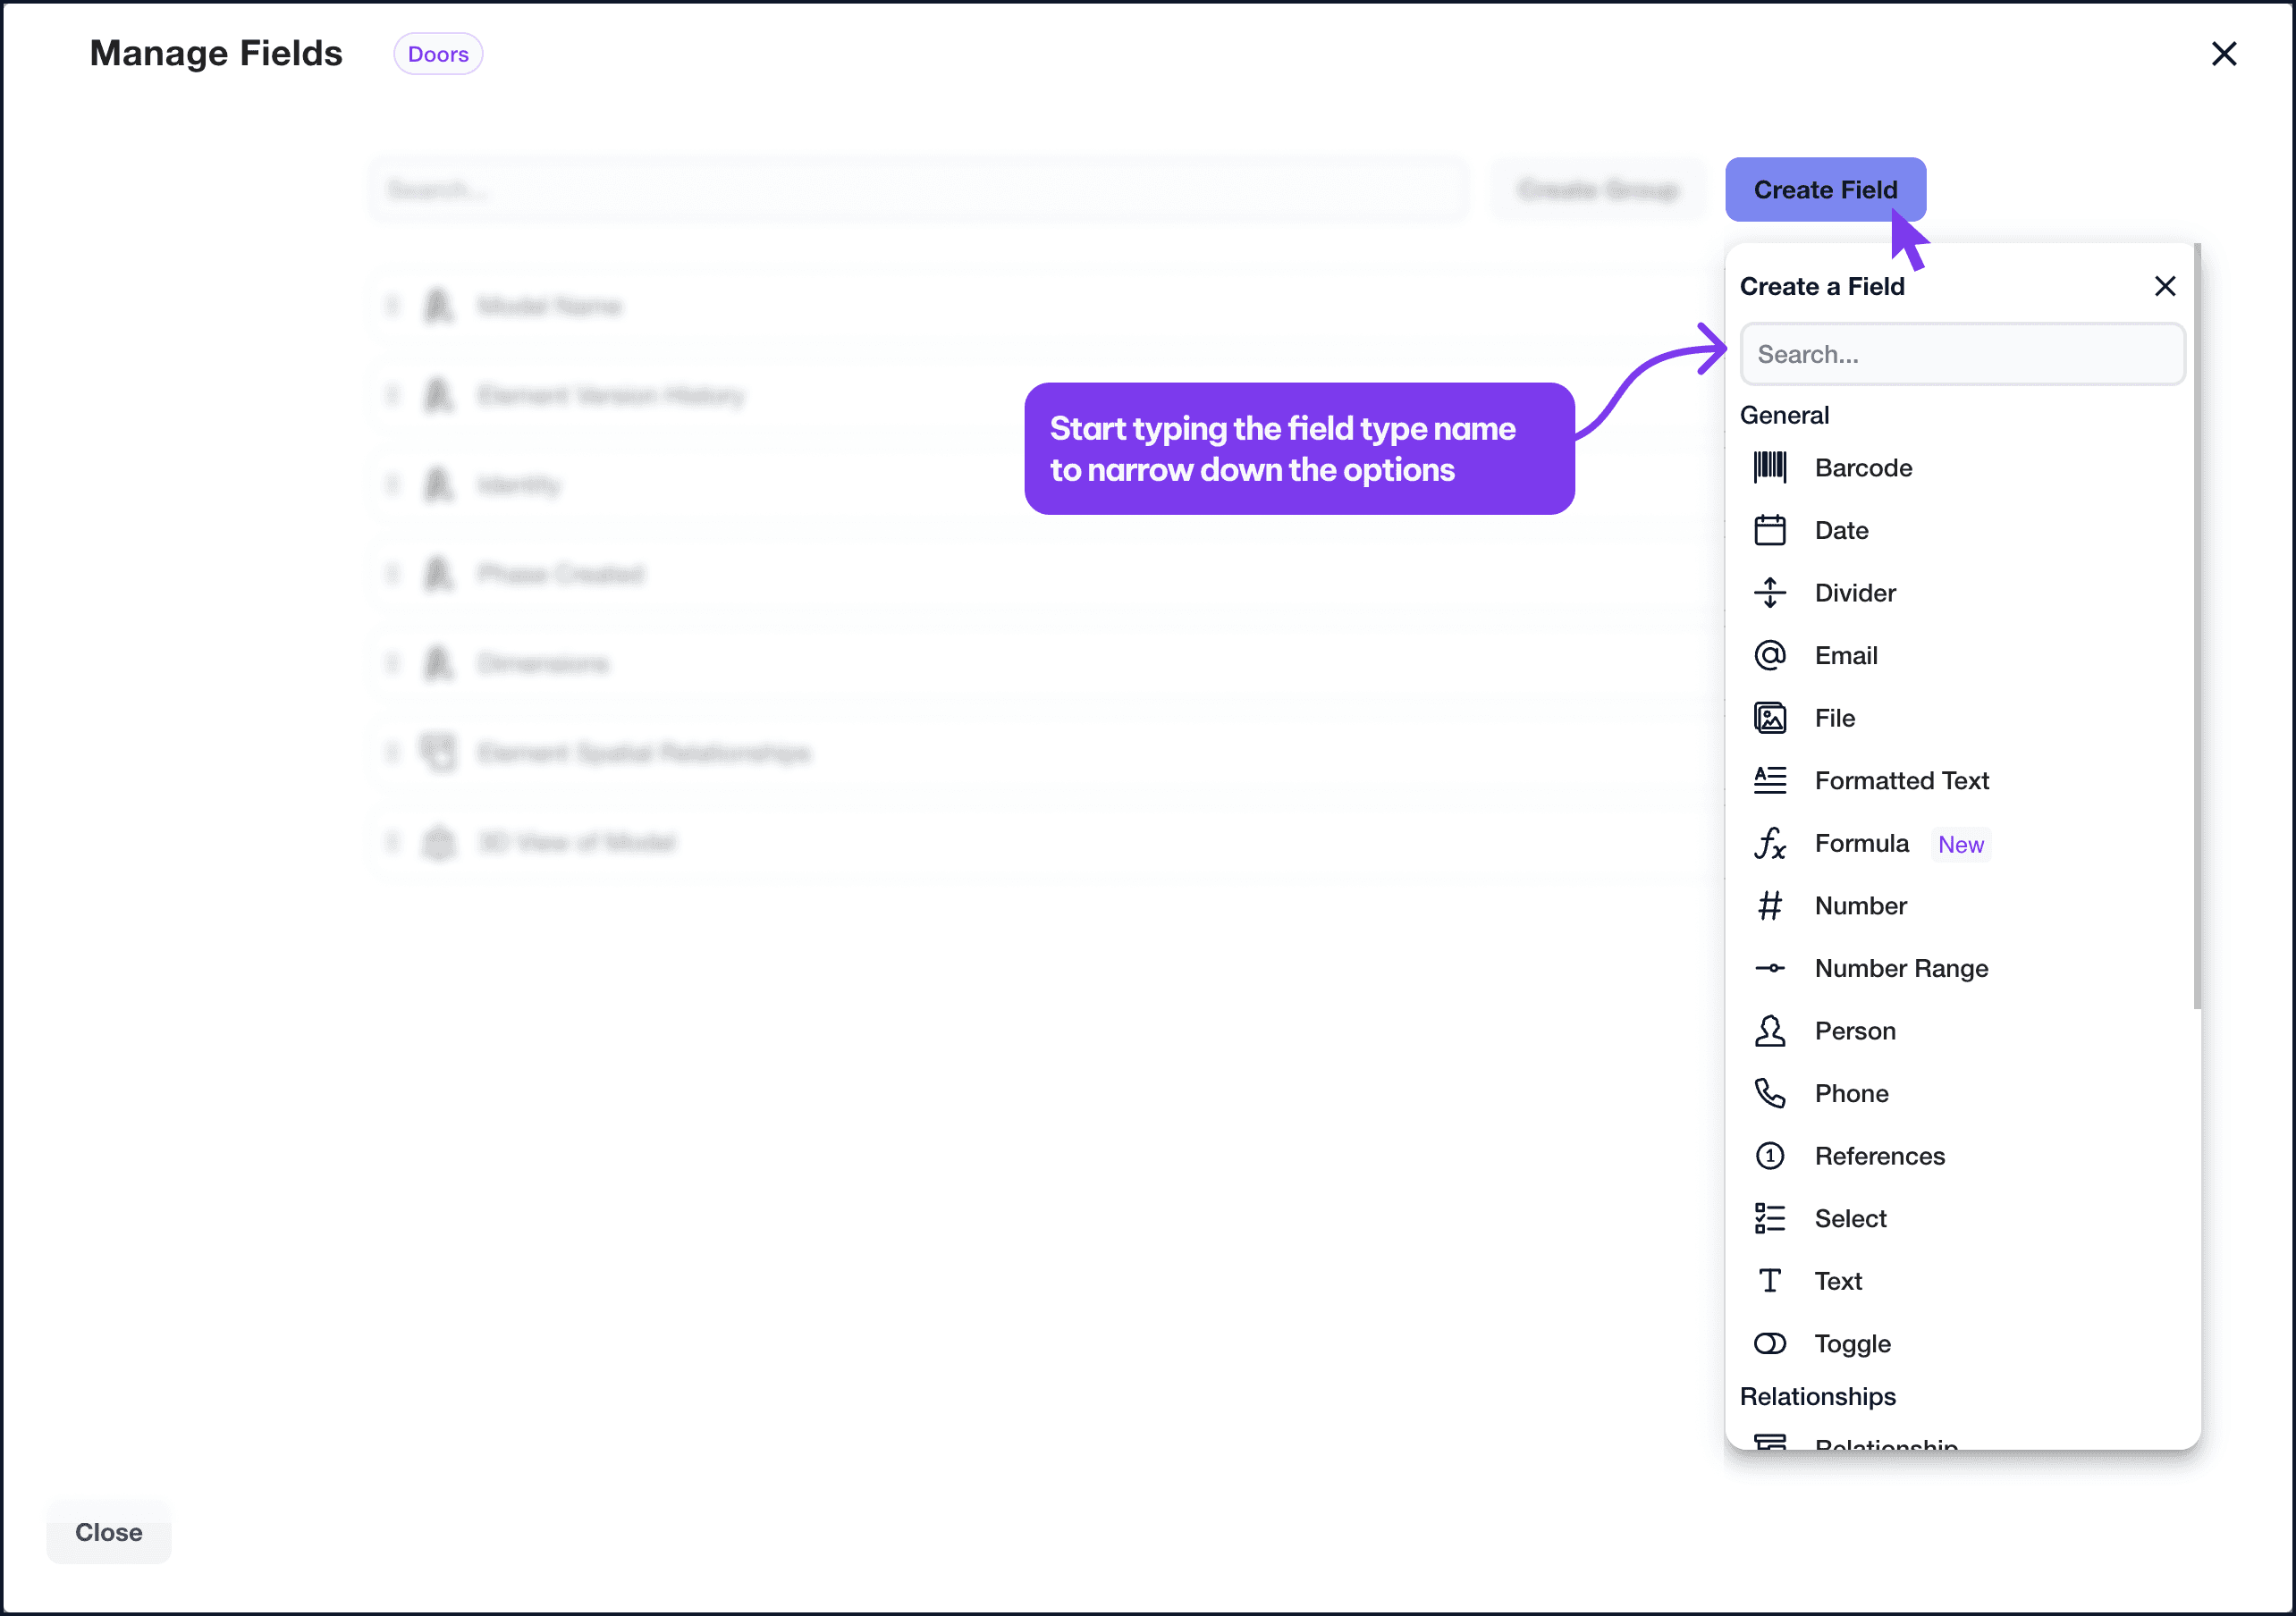
The field-type picker shown when adding a new field to a category.
Fill in the fields and click Create Field.
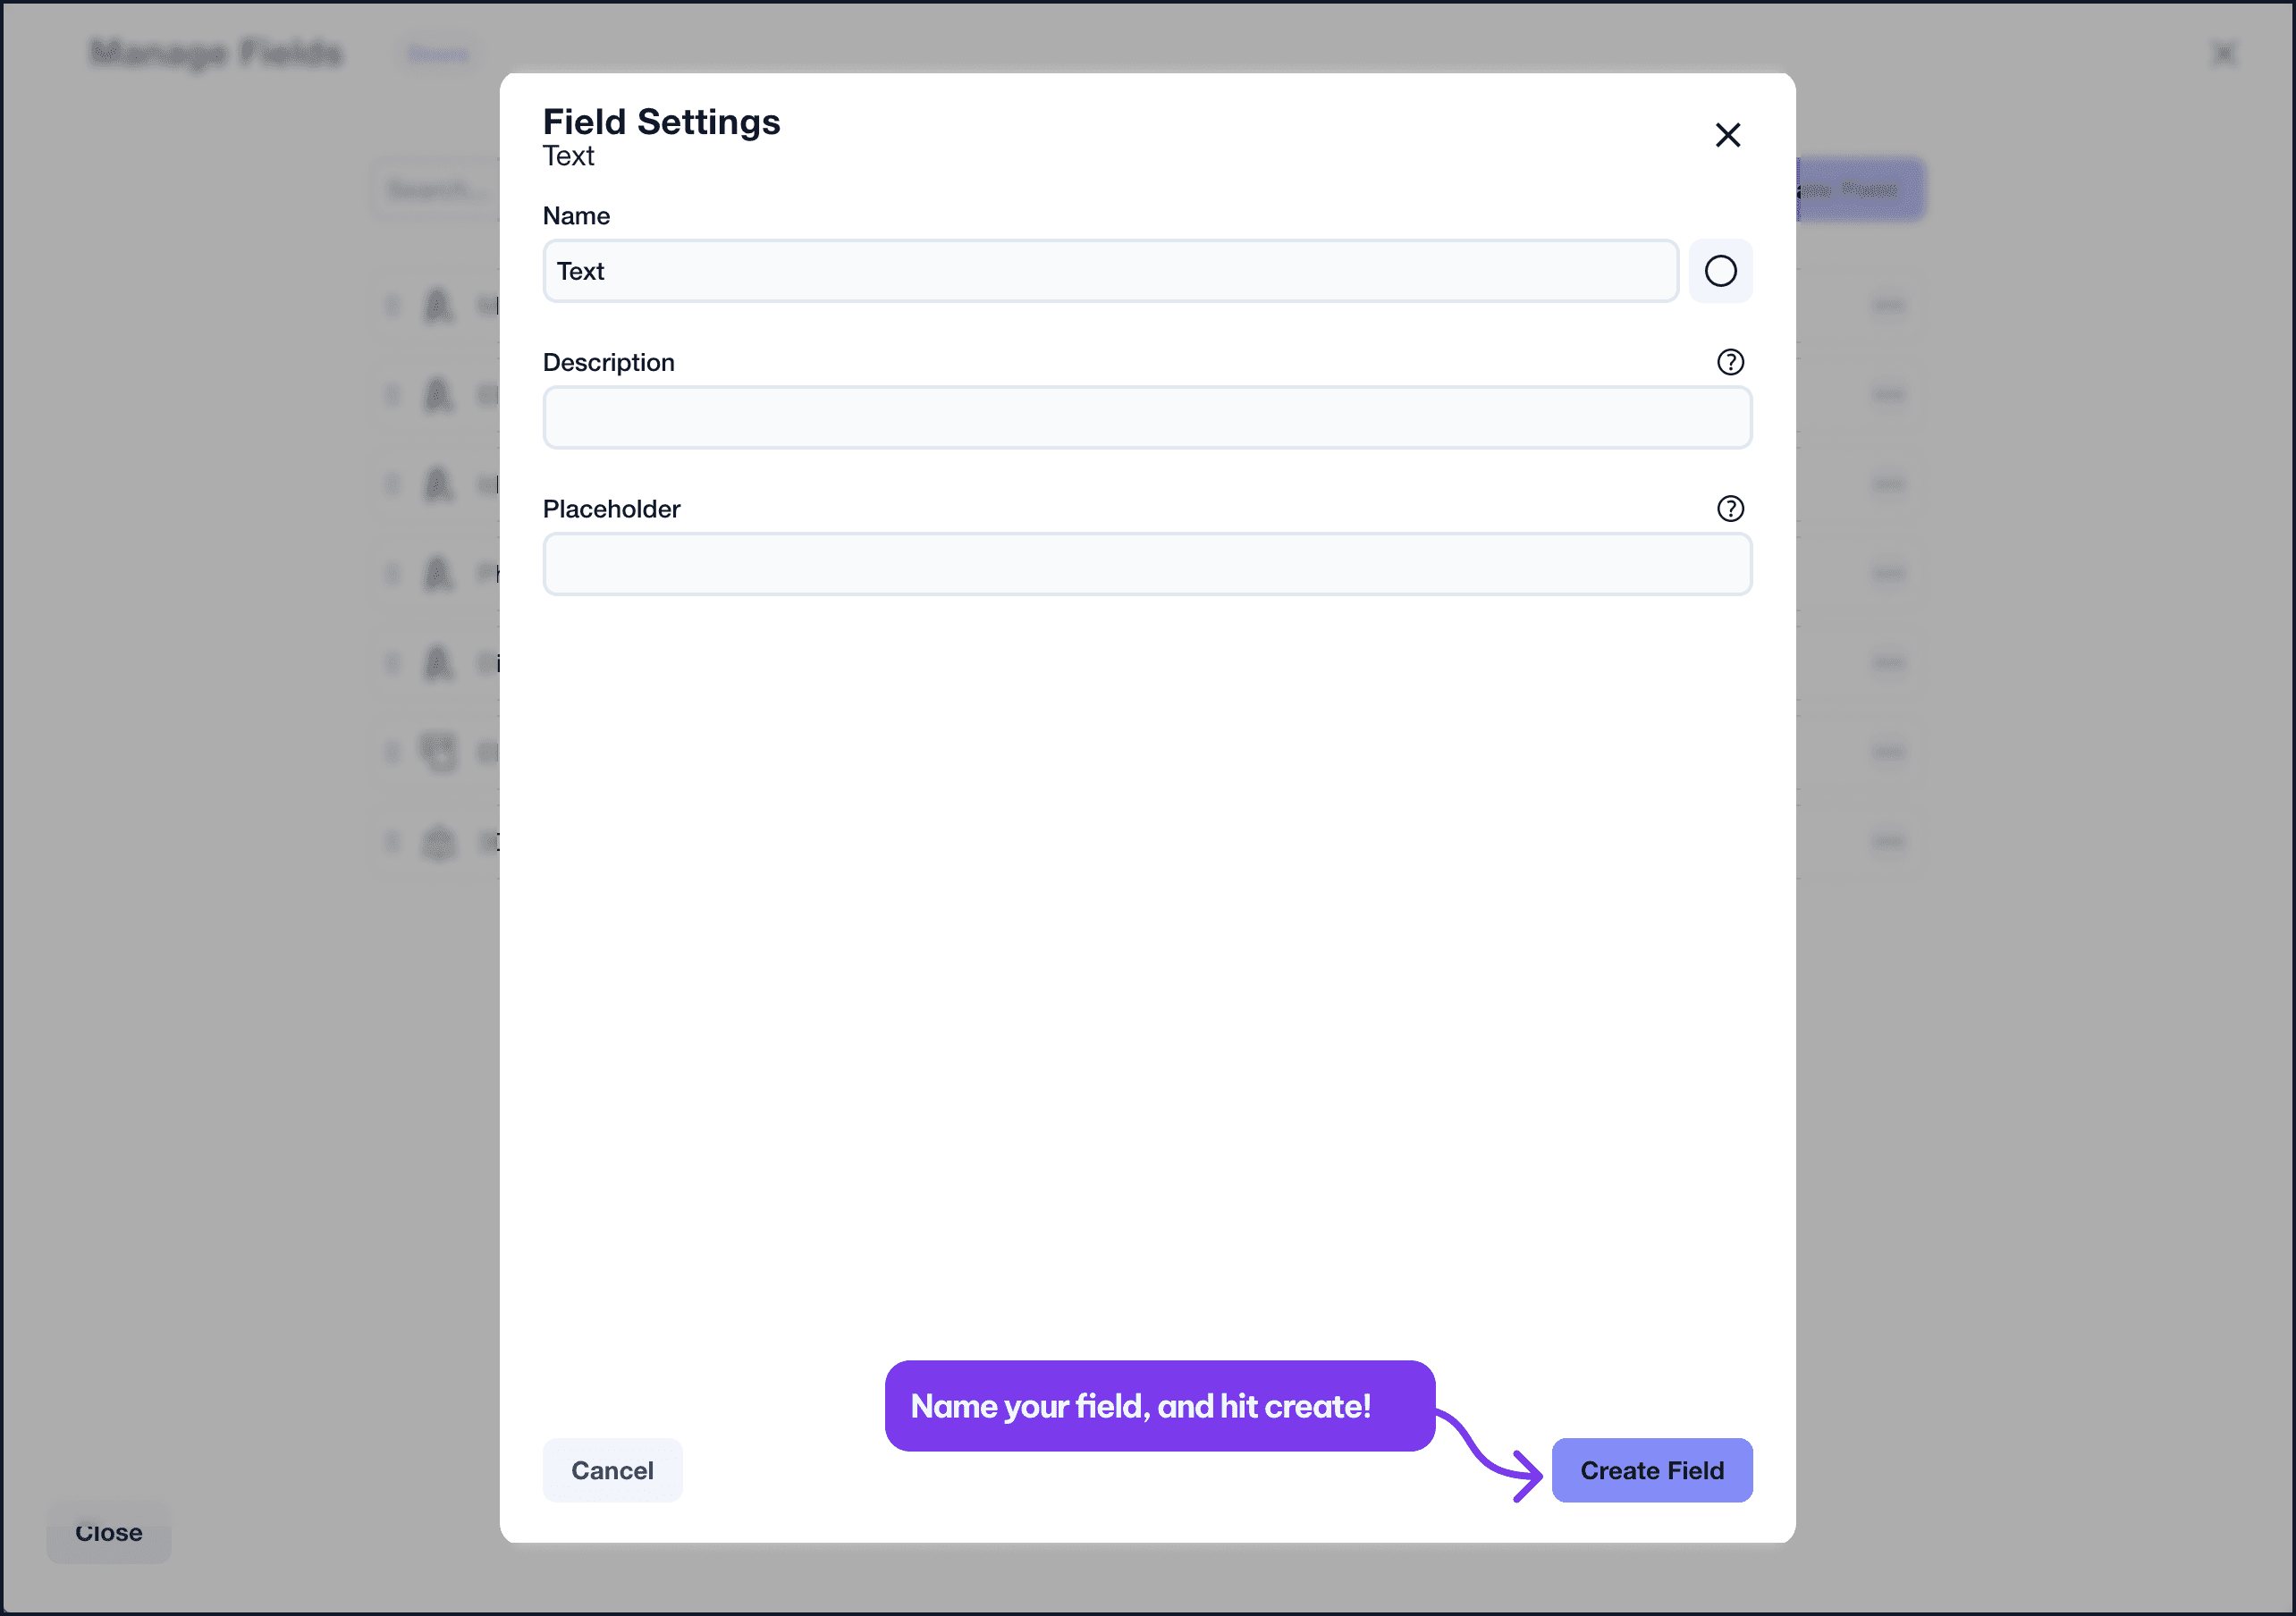
The Create Field form for naming, describing, and styling a new field.
Name is a required field, but Description and Placeholder are not.
Description will be displayed in the element detail pane and can serve as instructions or an example for formatting.
Placeholder will add text that will be displayed, but not an actual value for the field.
Add a Highlight Color to help organize your element detail pane.
Looking for default values? Use Automations to preset a value for newly created elements.
Manage Fields
In your Element Detail Pane click the three dots in the upper right hand corner to open your Element Settings and click the Edit Fields option. You can also find this option to Edit Fields at the very bottom of your Element Detail Pane.
The Edit Fields entry point inside the Element Detail Pane settings menu.
From the Manage Fields screen, you can adjust the order of Fields, or edit the settings for the Fields themselves. You can also create new Fields and Fields groups as well.
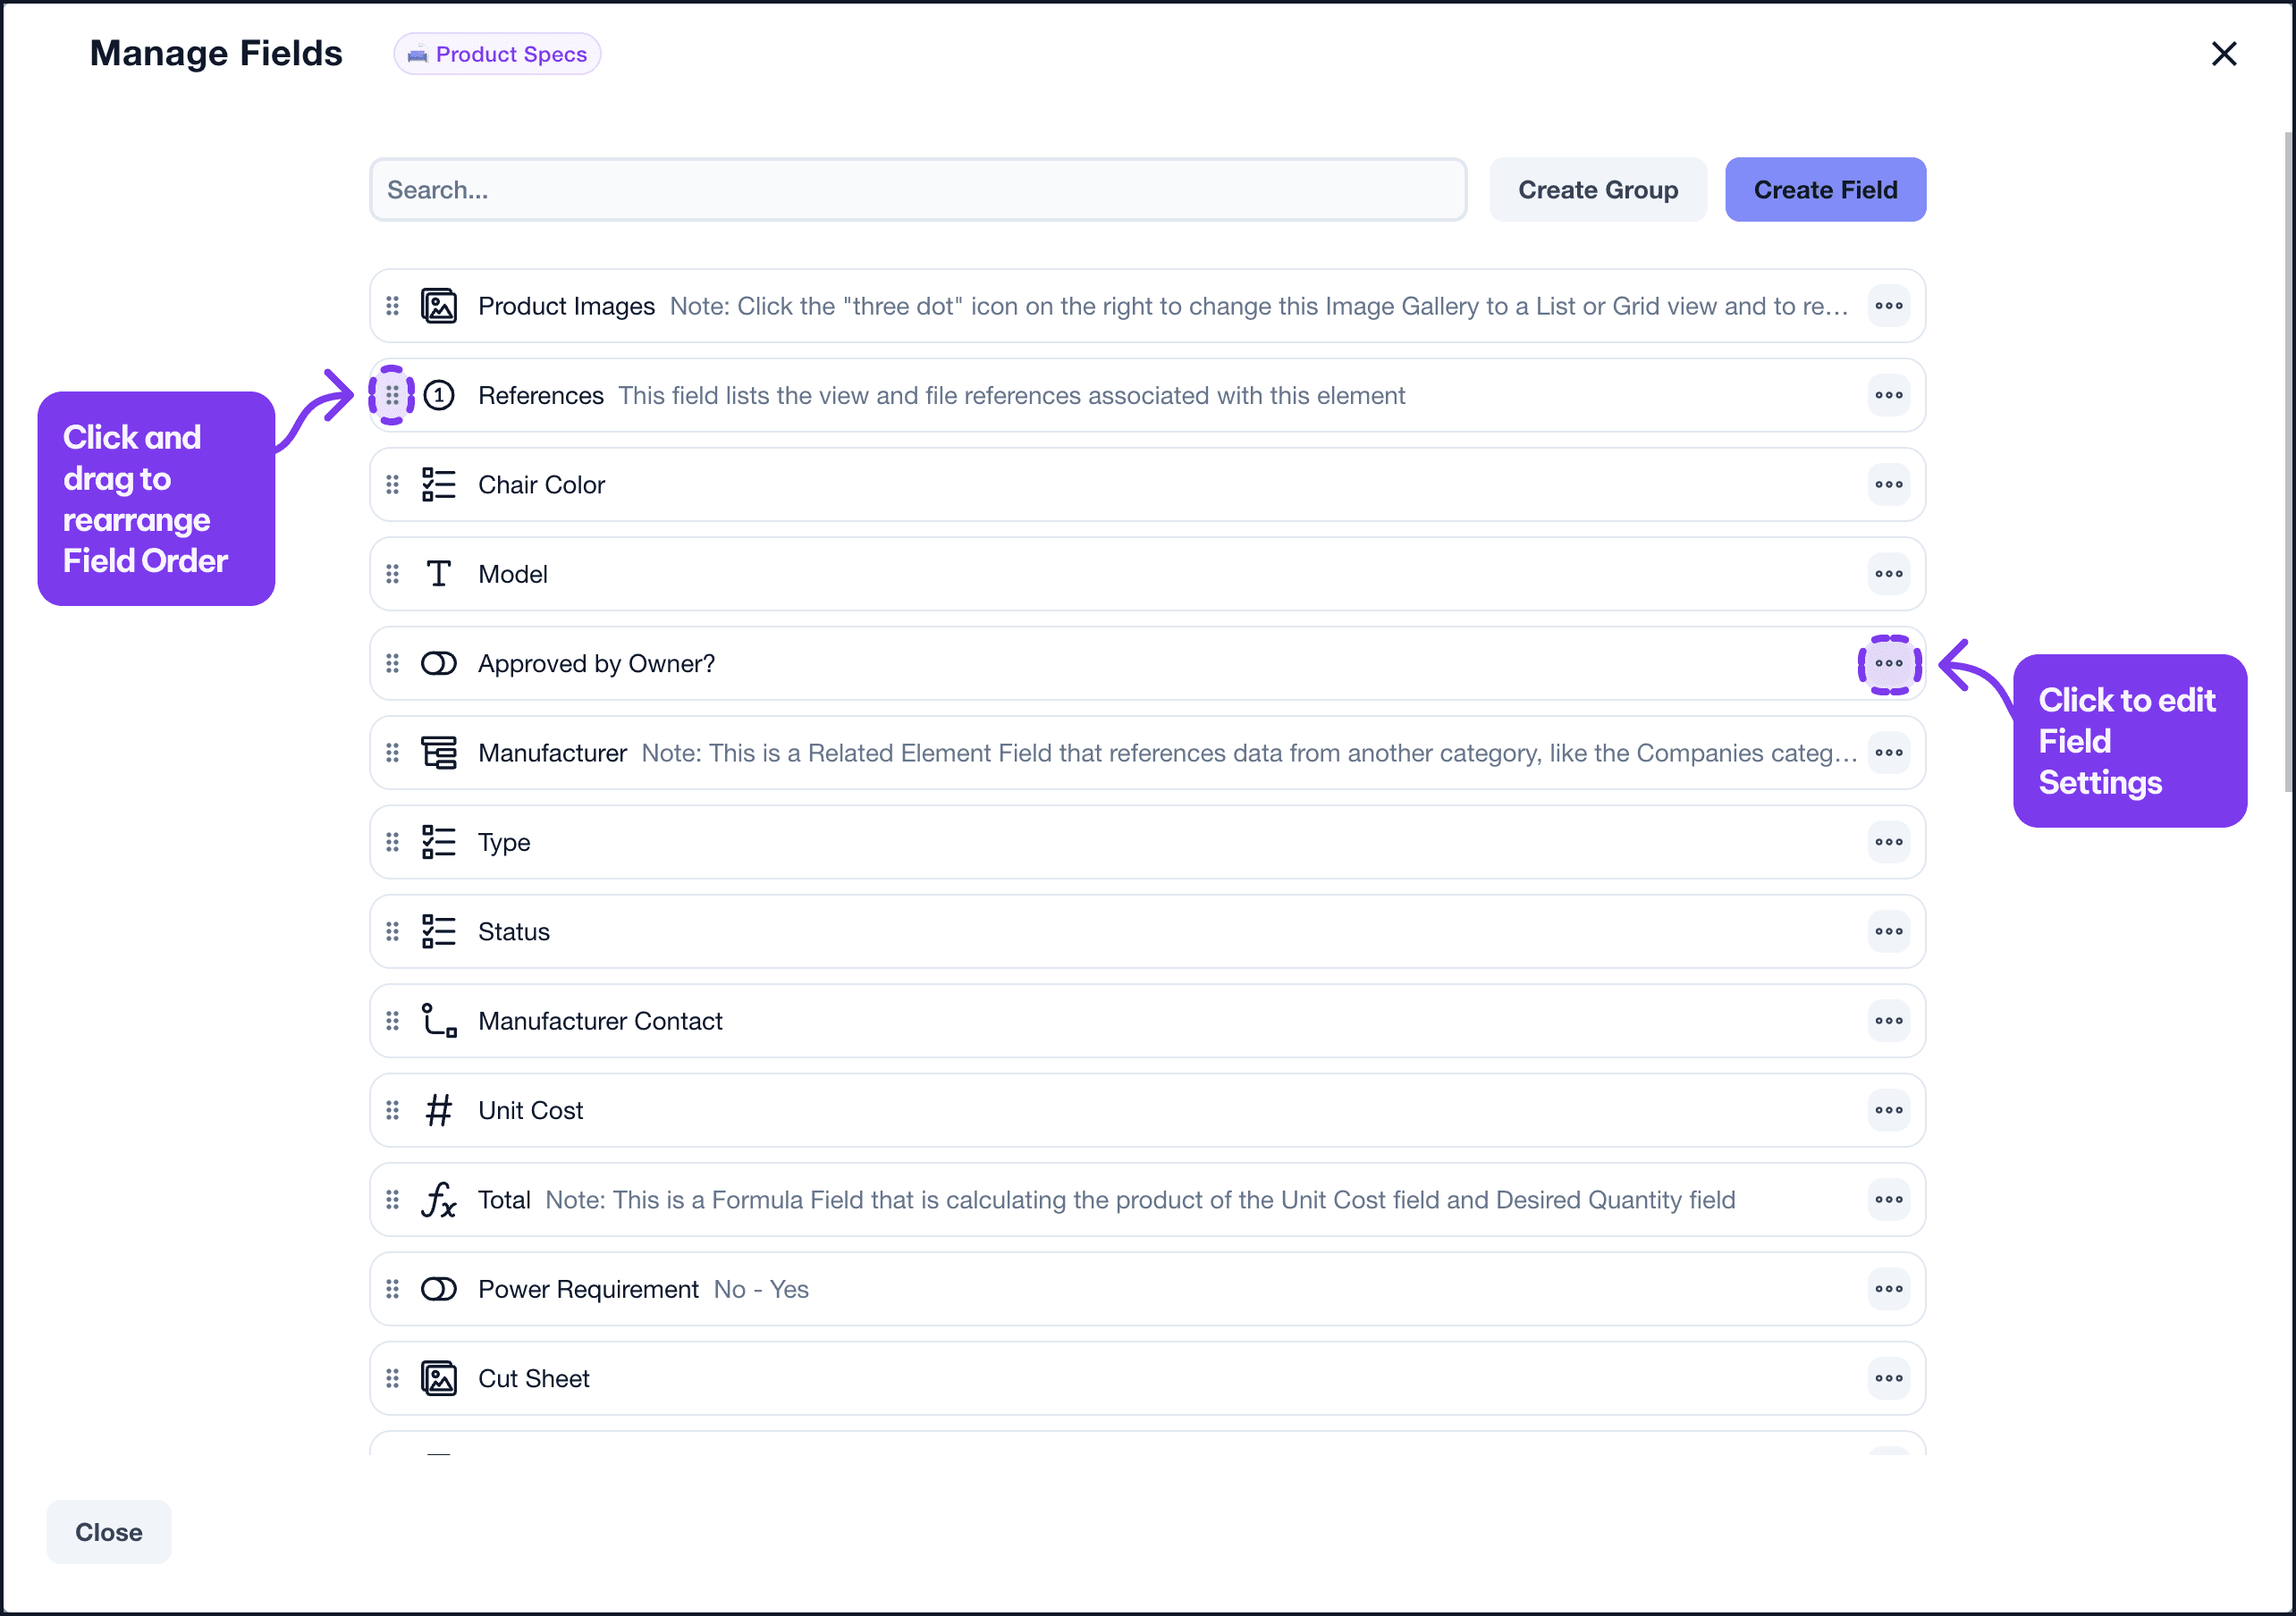
The Manage Fields screen for reordering, editing, and grouping category fields.
Edit, Duplicate or Delete a field
From the Element Detail Pane, you can click the 3 dot button to the right of the name to access Field Options. From there you are able to Edit field, Duplicate field or Delete field.
Edit field: Brings up the settings for the field
Duplicate field: Creates a new field directly below with the same settings. Values are not copied over.
Delete field: Archives the field and its data
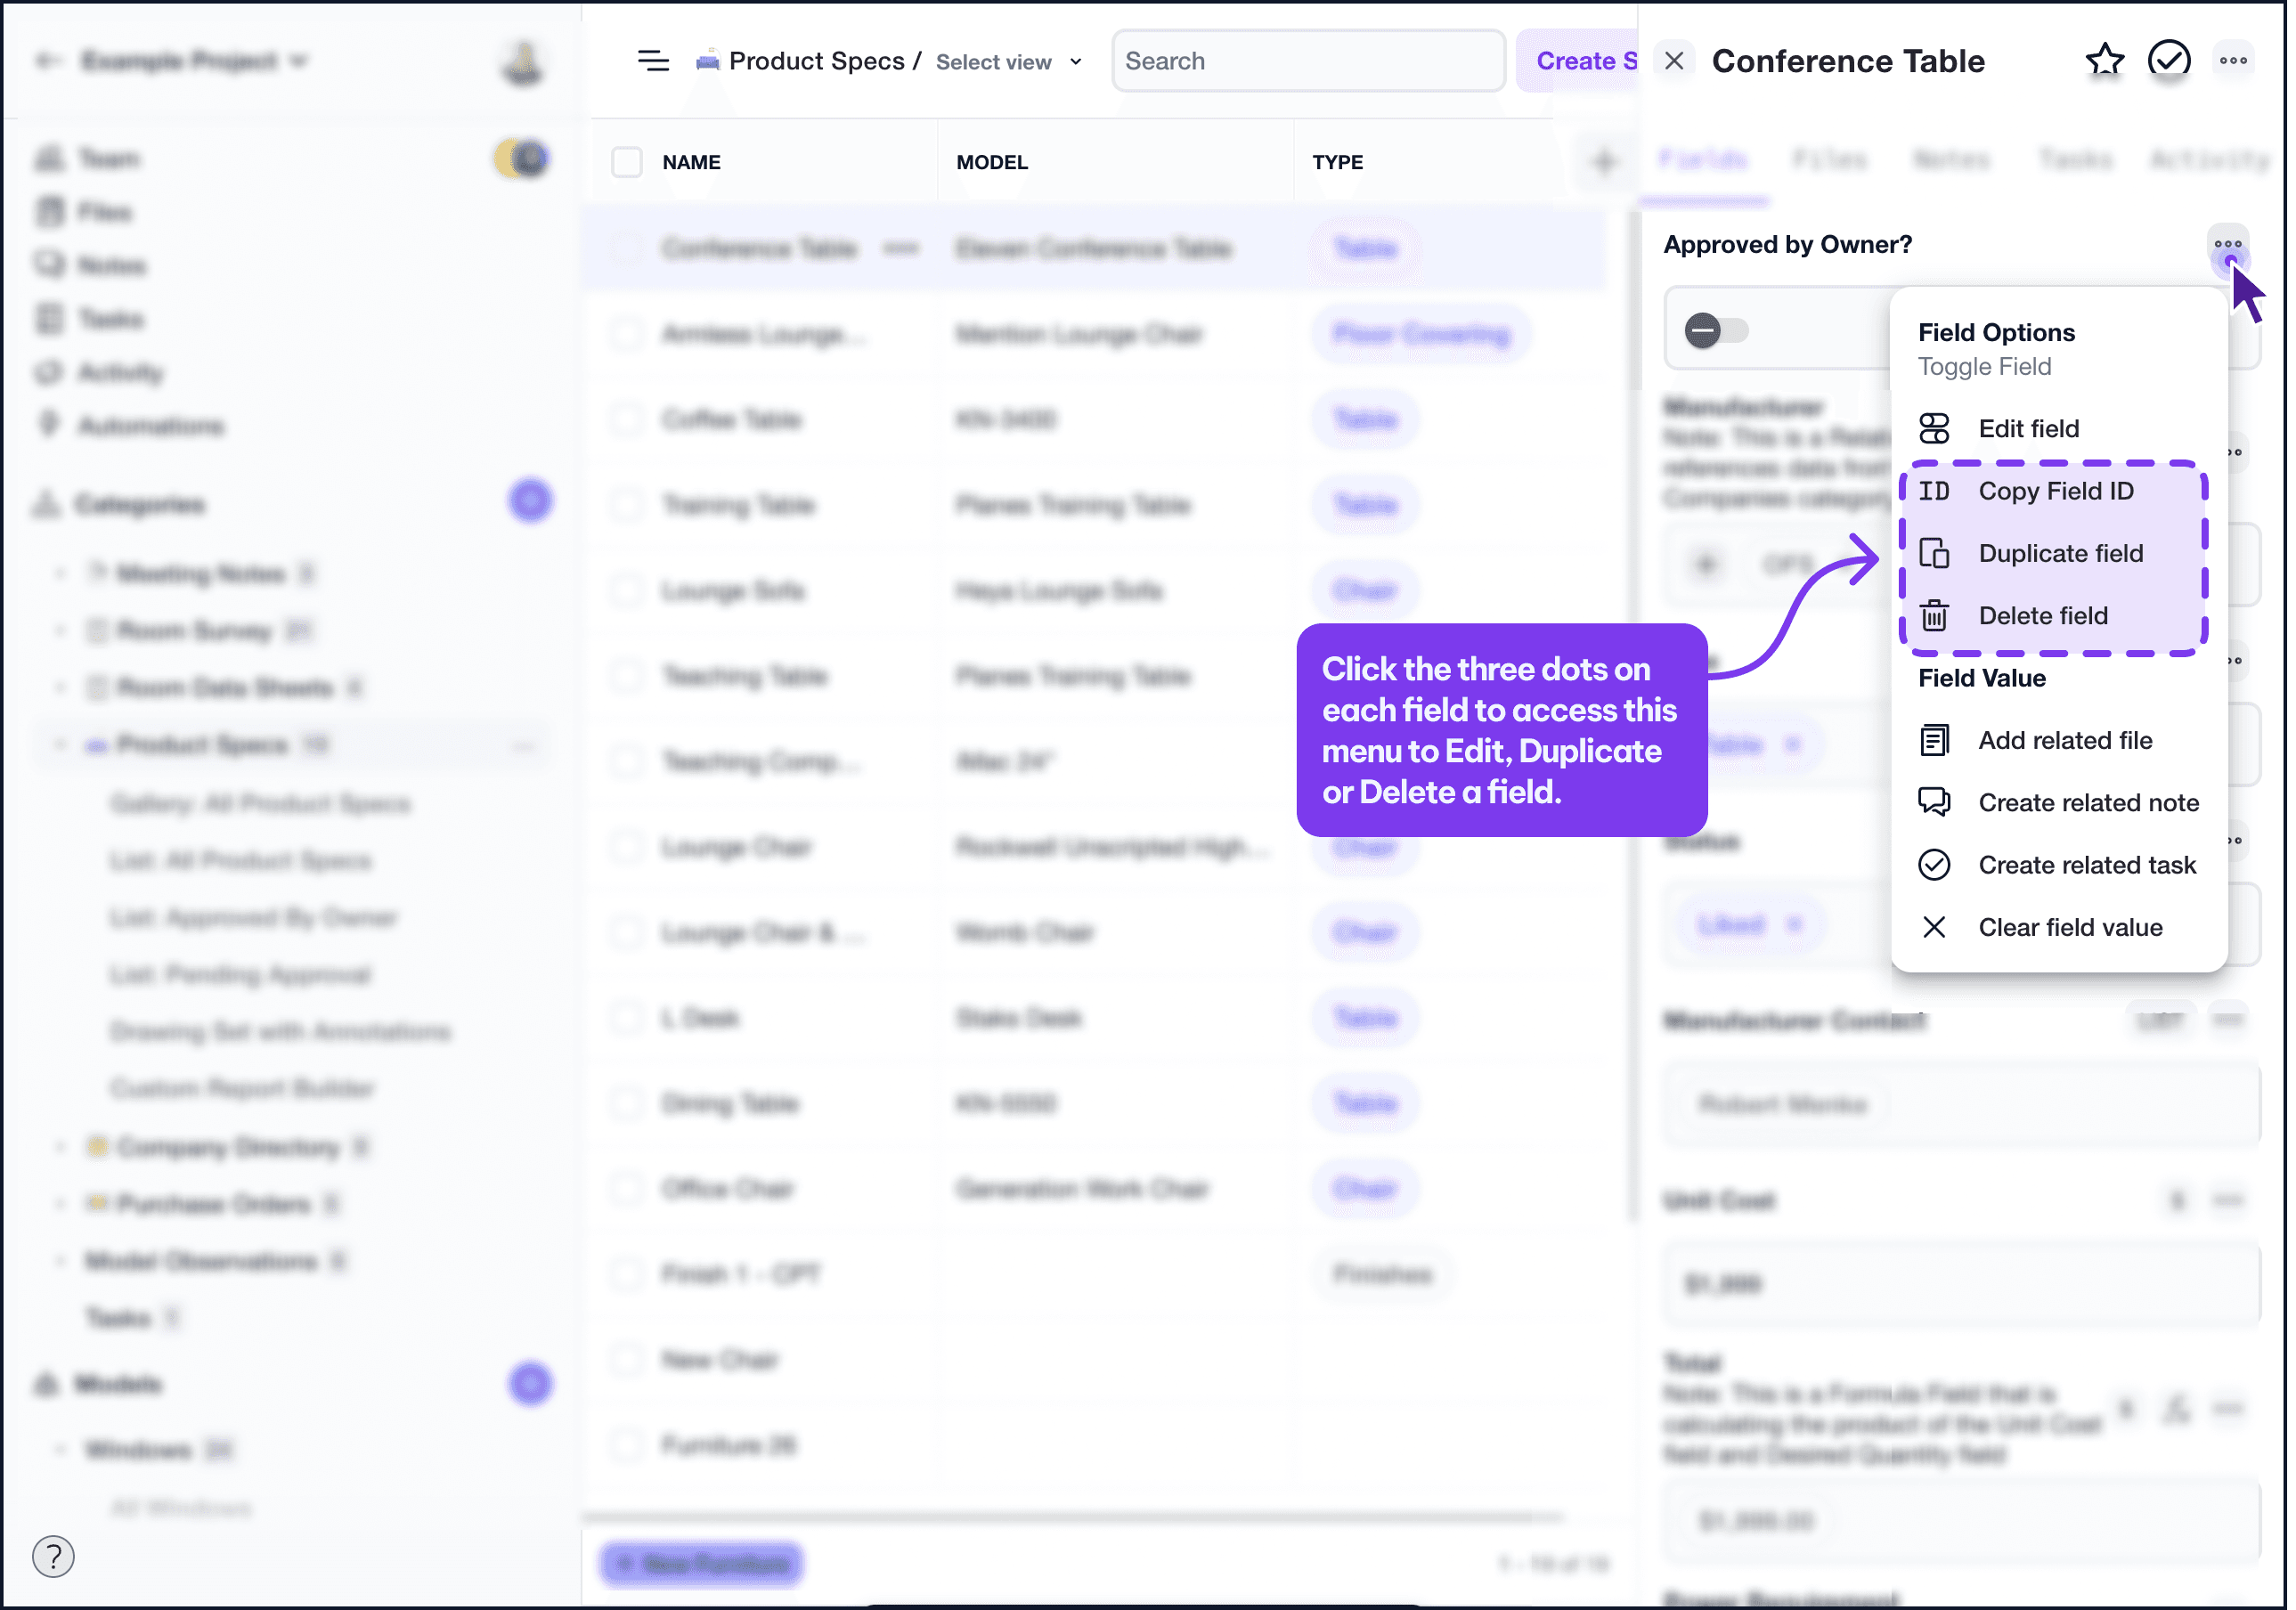
The Field Options menu with Edit, Duplicate, and Delete actions.
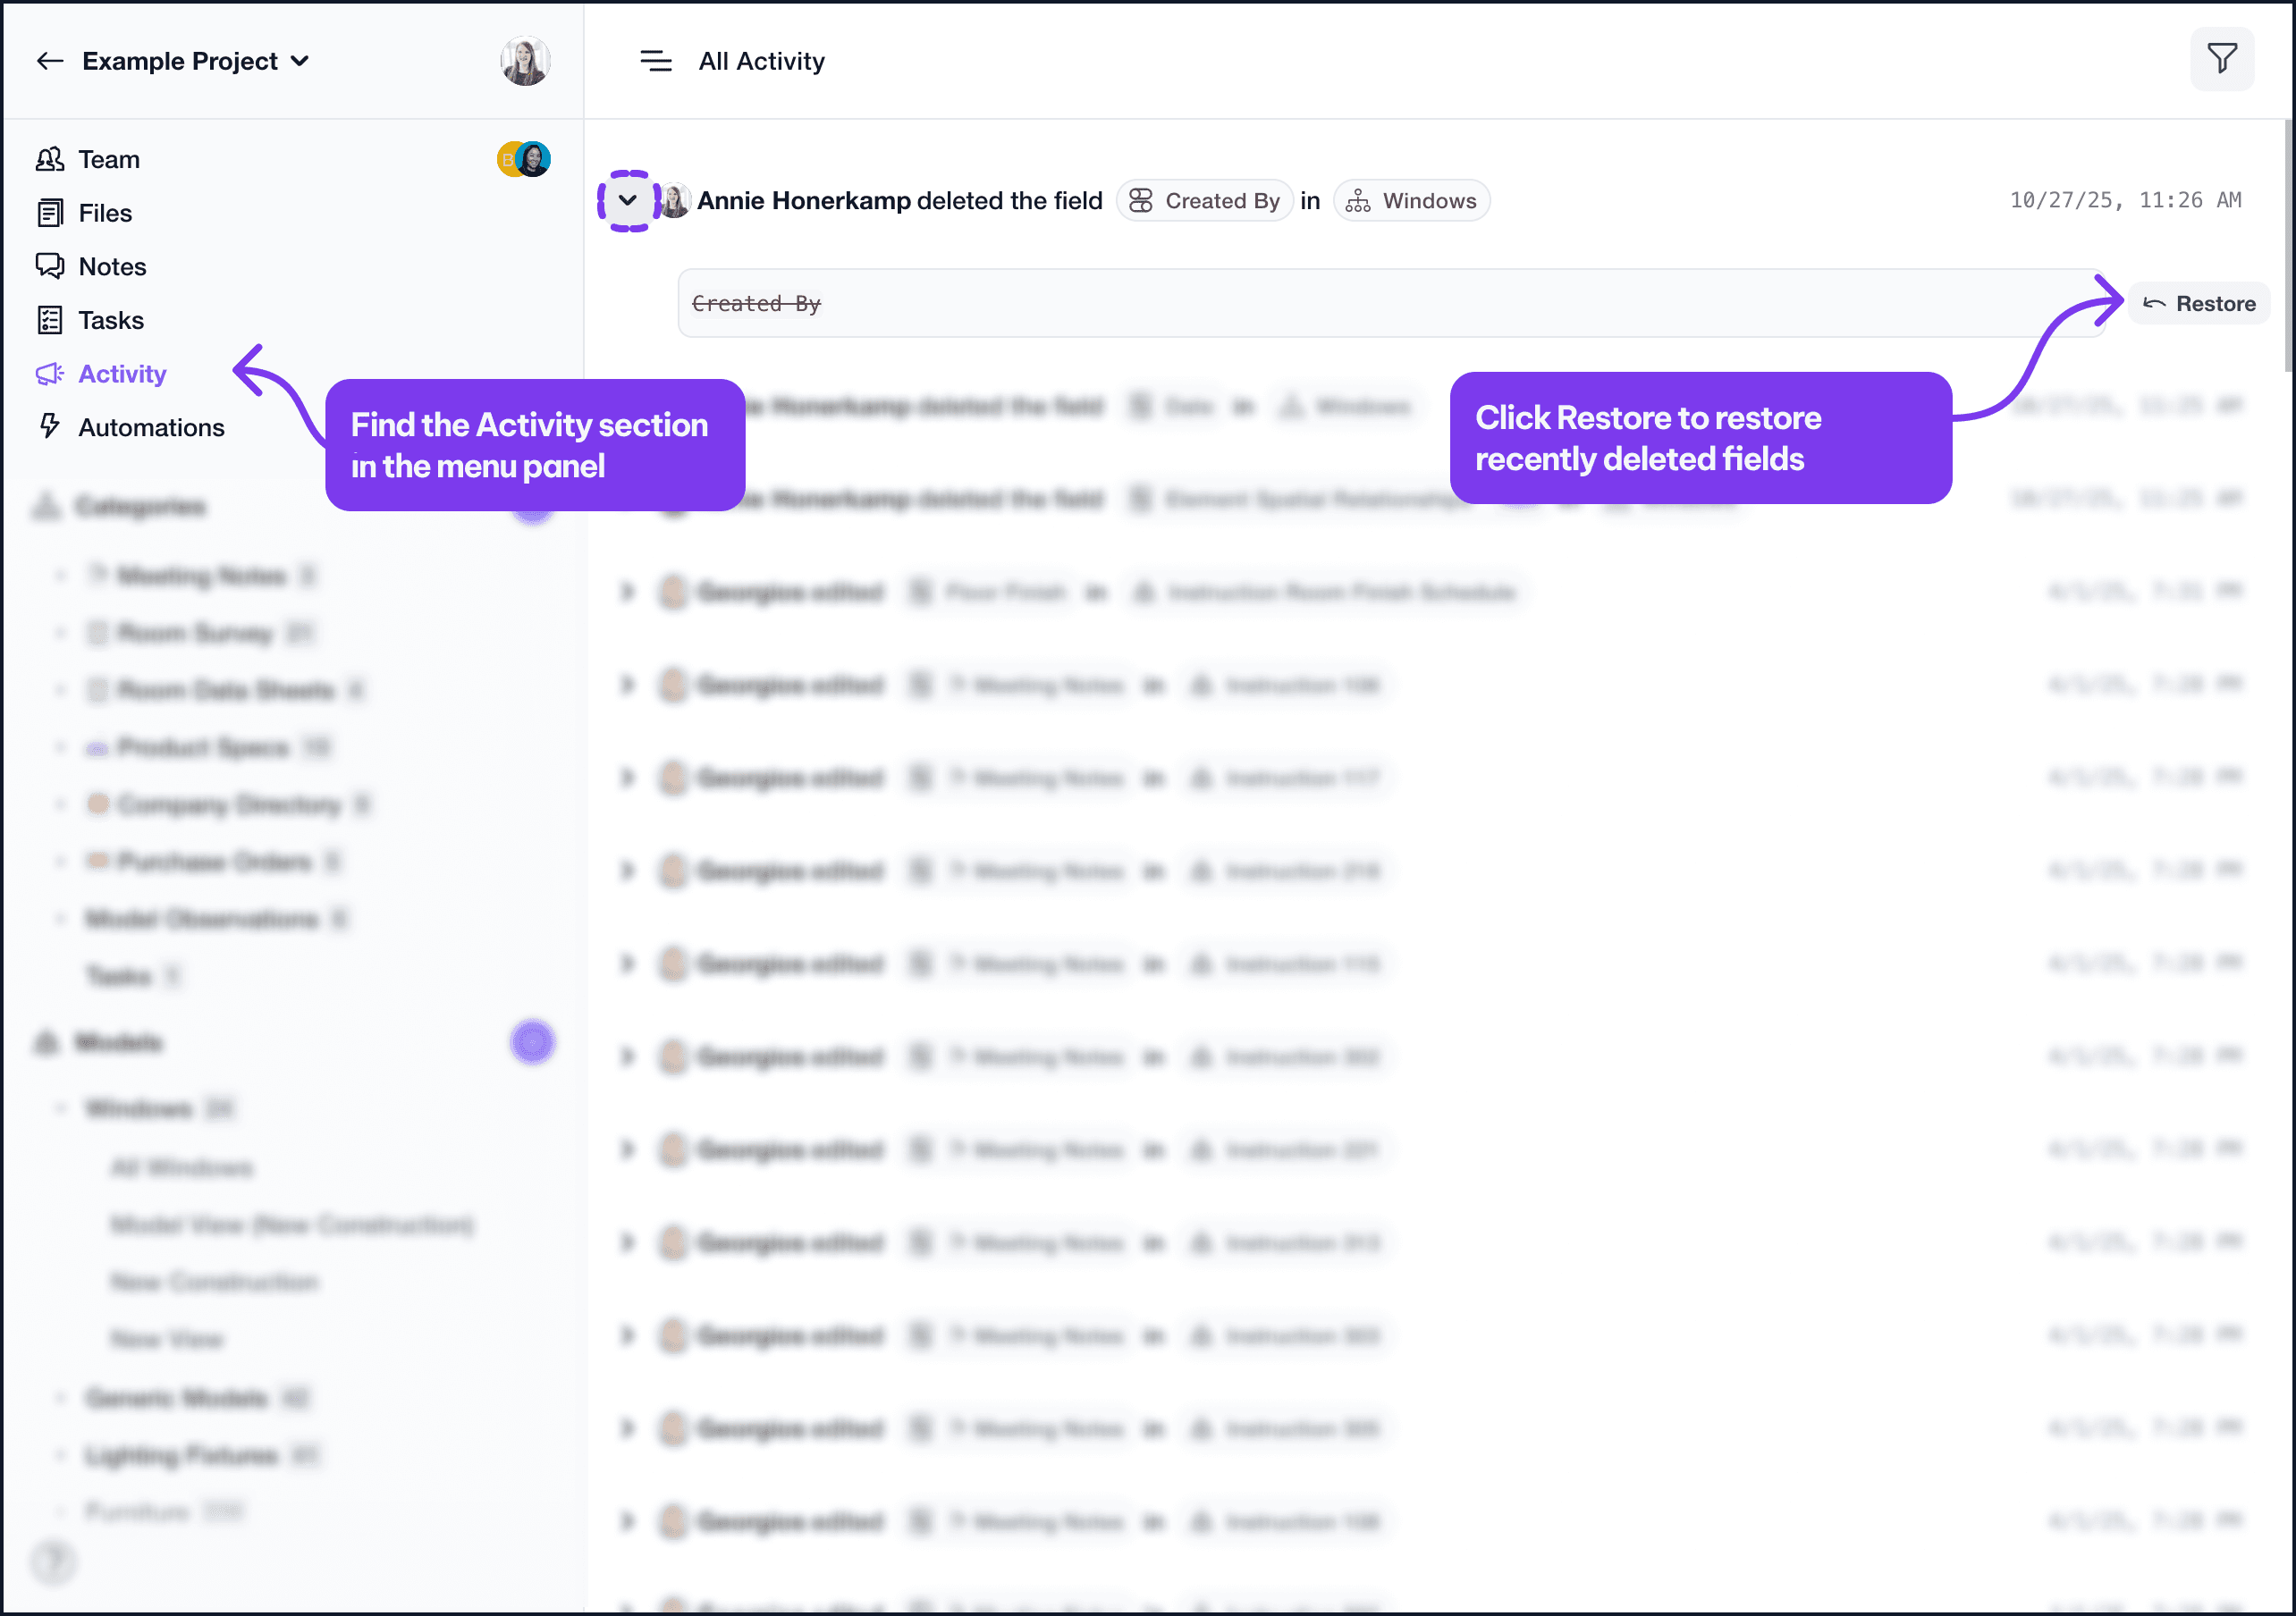
Note: If you accidentally delete a field, you can go to your Activity section of the project to find the field and click Revert Activity to undo the action. Layer keeps an archive of deleted items for 30 days. If you need assistance, please reach out to our support chat.