How to update multiple elements at once in Layer using the bulk edit dialog from the table view.
The bulk edit dialog lets you update field values across many elements at once. Use it to apply the same update (a status change, a category, an assigned reviewer) to a batch of records in one action.
This article covers selecting elements, opening the bulk edit dialog, and applying changes safely.
When to use bulk edit
Common situations:
Marking every Open task in a category as Complete after a phase ends.
Setting a Reviewer field on every element that needs a specific reviewer.
Updating a Status from Pending to Approved across a vetted batch.
Backfilling a new field with a default value across existing elements.
For one-time, per-element edits, the regular Element Detail Pane is better. For bulk patterns that should run automatically going forward, see Automations.
Selecting elements
Open a Table View in the relevant category. Each row has a checkbox at the left. Select rows individually or use the header checkbox to select every row in the current view.
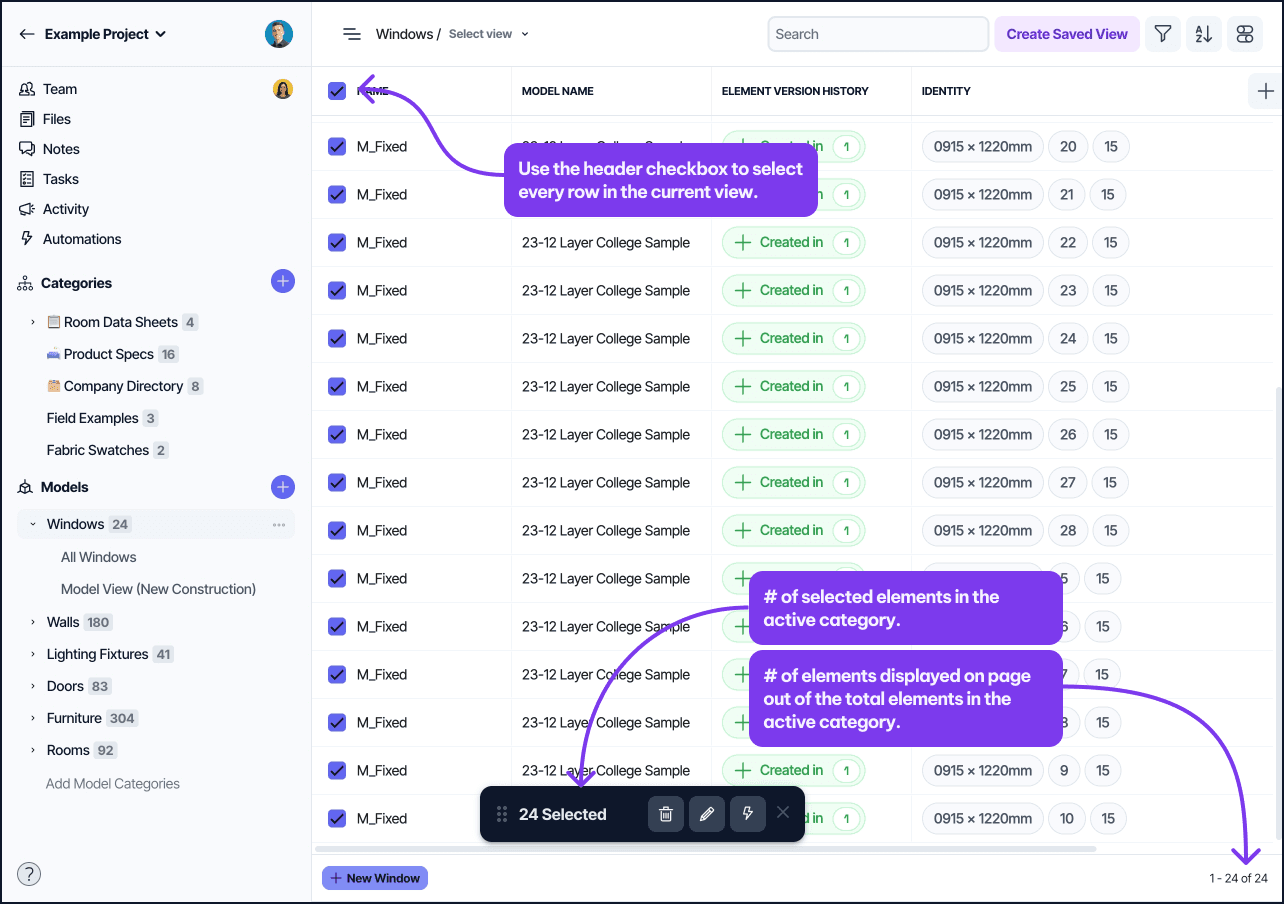
Selecting multiple rows in a Table View using the row checkboxes ahead of a bulk edit.
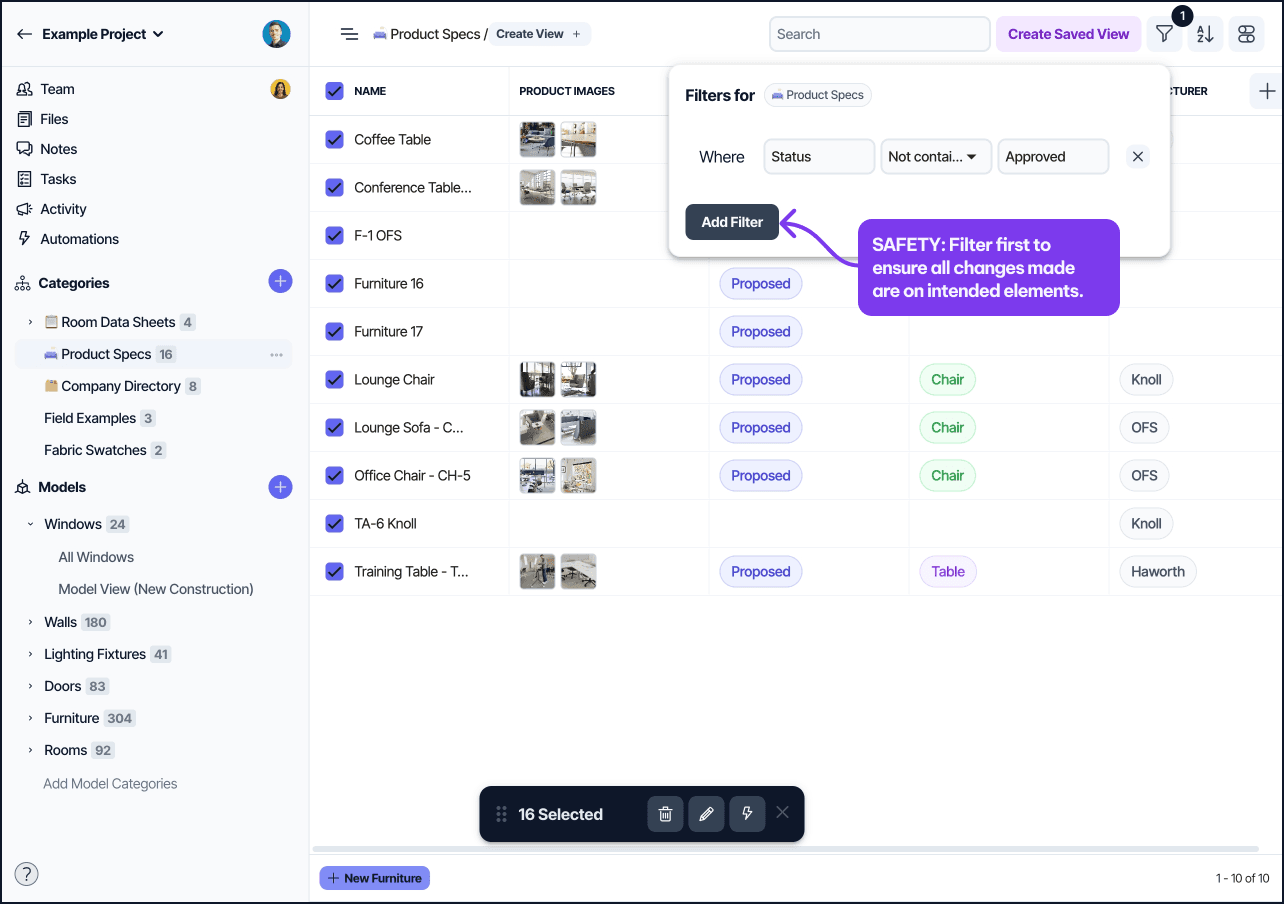
Filtering the view first is the safest pattern. Apply filters to narrow the table to exactly the elements you want to edit, then select all.
Opening the bulk edit dialog
With elements selected, click the Bulk Edit button in the table header.
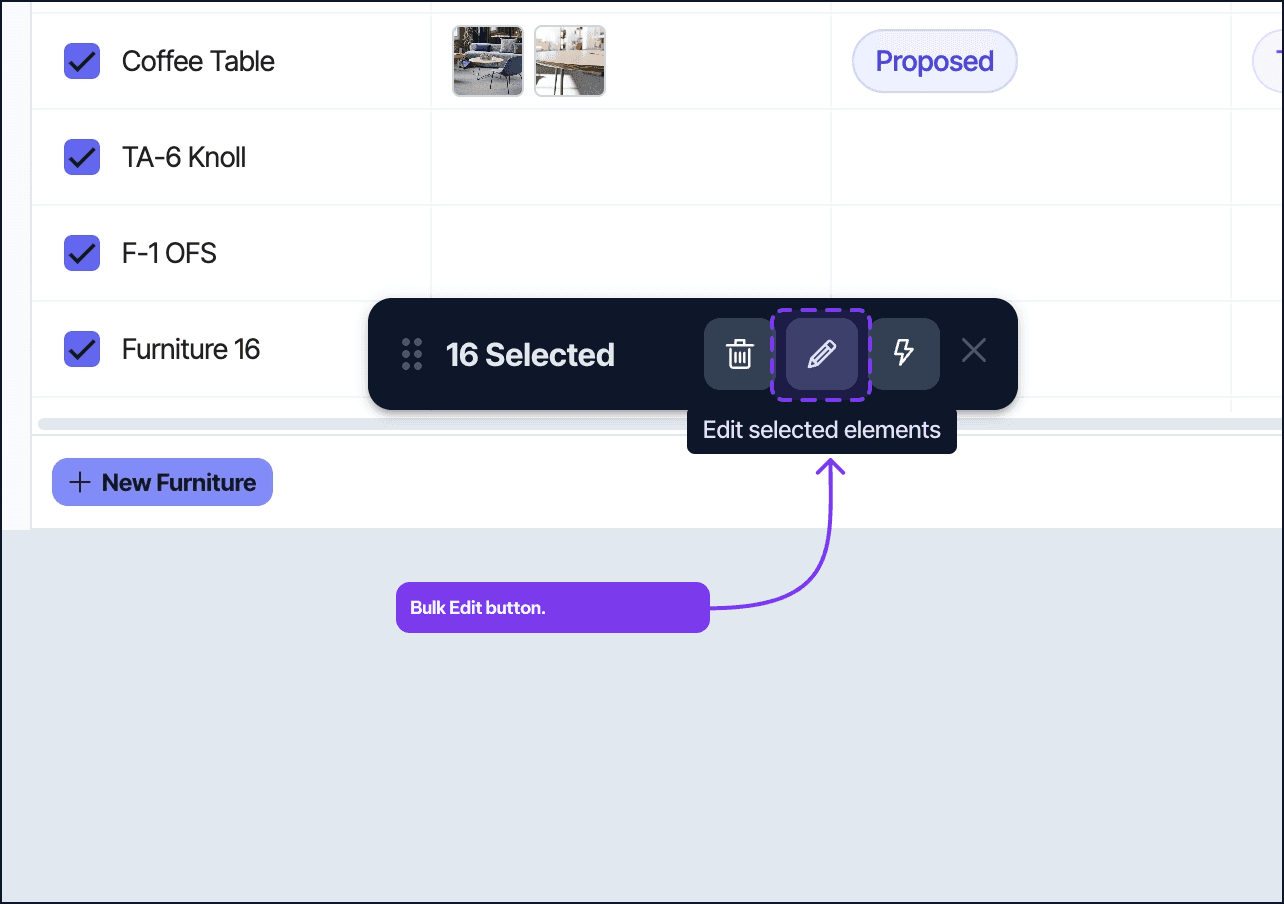
The Bulk Edit button in the Table View header, opened after rows are selected.
The dialog opens with two parts:
Selected elements: confirms the count of elements that will be updated.
Field changes: one or more updates to apply.
Adding field changes
For each field you want to update, add a row to the Field Changes section:
Field: which field to update.
Value: the new value to set.
Mode:
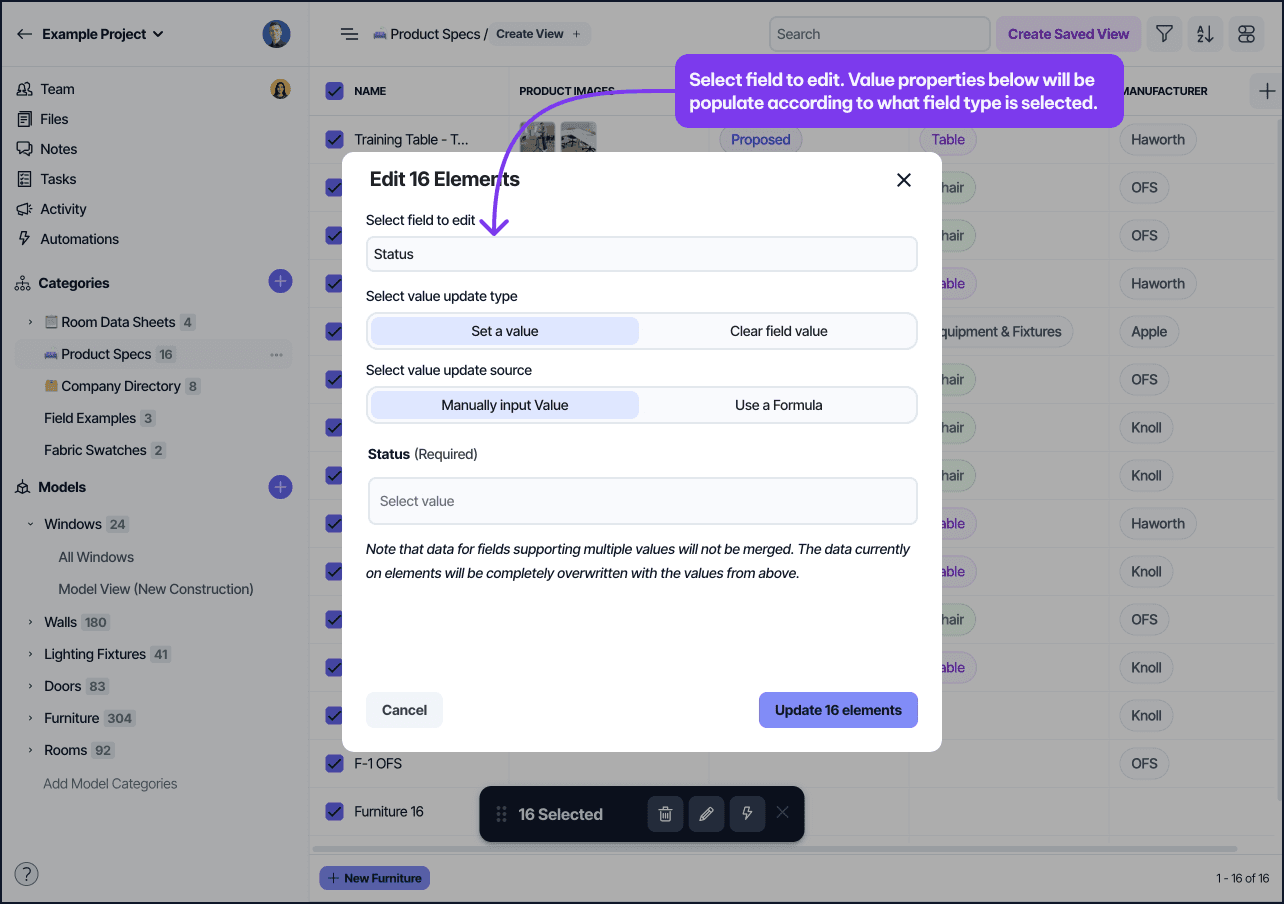
The Bulk Edit dialog’s Field Changes section with Field, Value, and Mode controls.
Fields that are read-only (Created At, Element Number, formula fields) cannot be bulk edited and do not appear in the field selector.
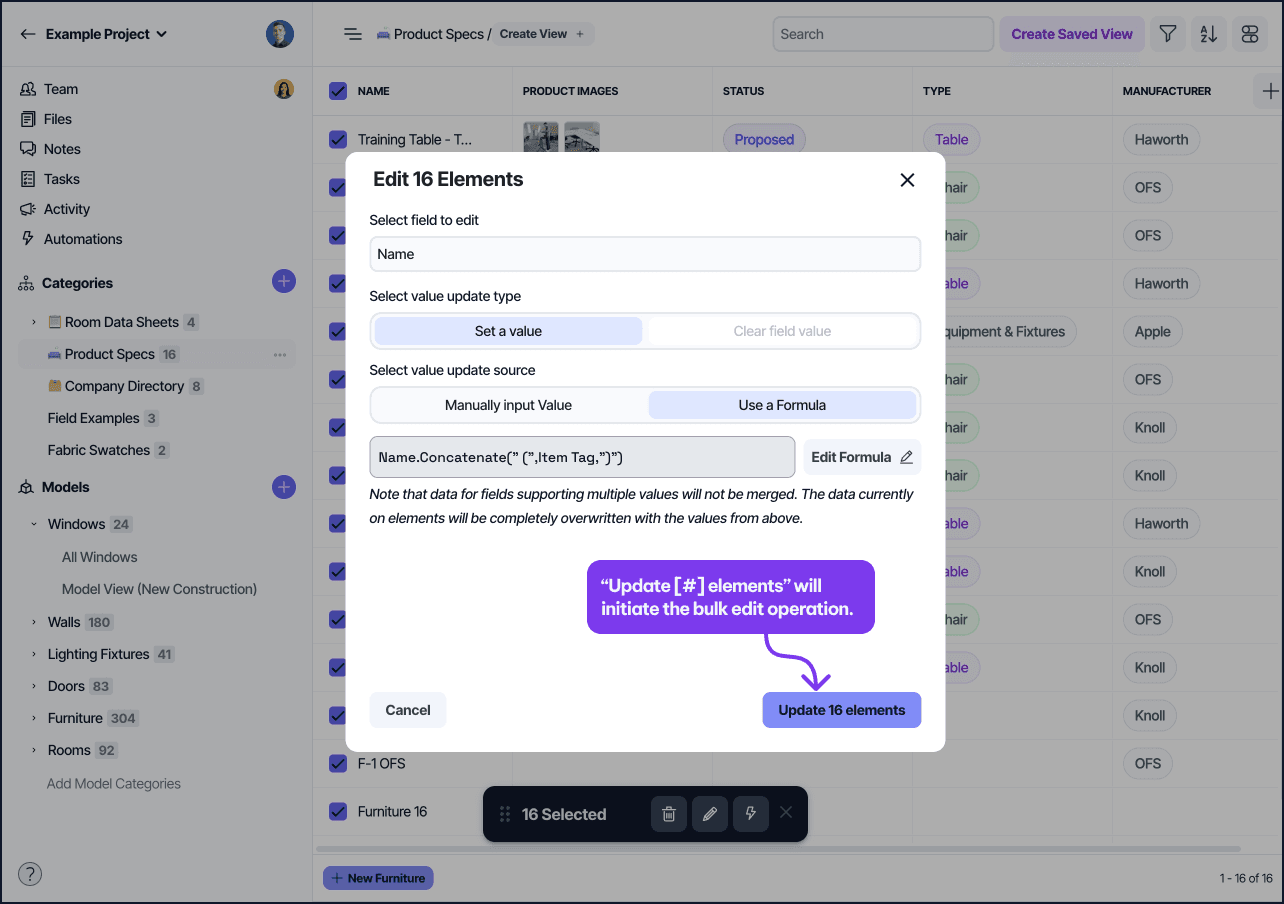
Using a formula as the value
The Value input on each field change has a switch labeled Use a Formula. With the switch on, the value is computed per element using a formula expression rather than a single literal.
This is useful when:
Each element should get a different value derived from its existing fields, for example setting a Display Name to
CONCAT({Project Phase}, " - ", {Room Number}).The new value depends on the date the bulk edit runs, for example stamping a Reviewed On date with
NOW().You want to clean up an existing field, for example trimming whitespace with a formula on the same field set to
TRIM({Room Number}).
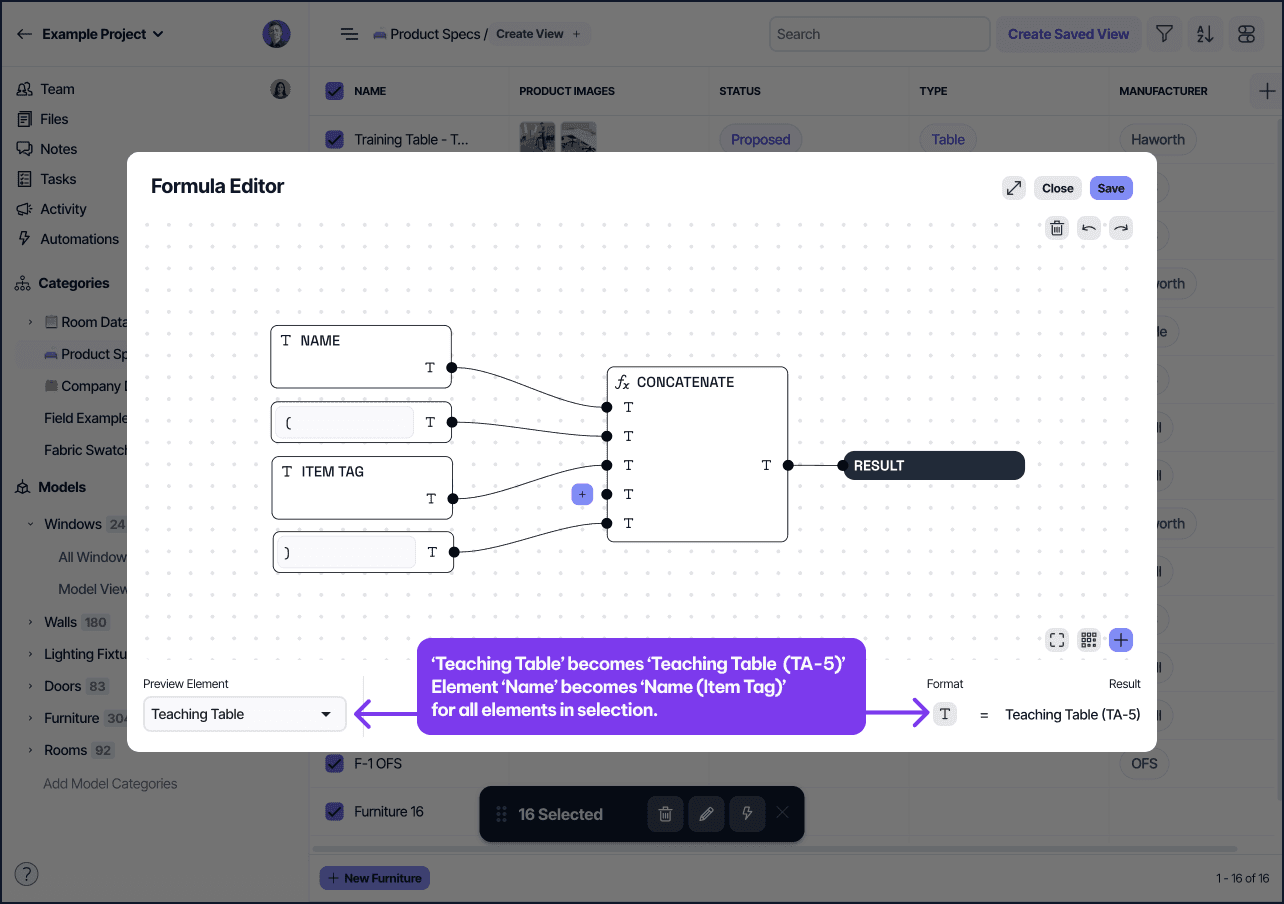
The Use a Formula switch in the Bulk Edit dialog for computing values per element.
The formula runs once per selected element and uses the element's own field values as inputs. Formula syntax matches Formula v2; see Formula v2 fields for the full reference.
The formula's return type must match the field type being updated. A formula that returns a number can populate a Number field but not a Text field. Layer validates the formula before applying the change and reports a clear error if the types do not match.
A few patterns worth knowing:
Reference other fields on the element with curly braces, for example
{Status}or{Assigned To}.Use
IFto apply a value only when a condition is true. Pair with another bulk edit run for the inverse condition if needed.Avoid referencing the field being updated when the goal is to set, not transform, the value. Layer evaluates the formula against the element's pre-update state, so self-referencing formulas read the old value.
Applying the changes
Review the summary at the bottom of the dialog. It tells you how many elements will be affected and what changes will run.
The Bulk Edit summary footer confirming element count and pending changes before applying.
Click “Update [#] elements”. The update runs server-side. Layer reports progress in a snackbar at the bottom of the screen and the table refreshes when complete.
Safety patterns
Filter first, select all. Selecting a filtered set is safer than scrolling and clicking individual rows.
Test on a small batch. Run the bulk edit on five elements, verify the result, then run it on the full set.
Use Replace deliberately. Replace mode overwrites whatever was there. If you need to preserve existing values for some elements, narrow the selection first or use Add mode where applicable.
Check the activity feed afterwards. Bulk edits are logged as individual element-update events in Project Activity. If something is wrong, you can revert specific elements from there.
Project Activity feed showing the individual element-update events recorded by a bulk edit.
Things to know
Permissions: Owner and Editor can bulk edit. Contributor can bulk edit only elements they created. Viewer and Restricted cannot bulk edit.
Automations may fire: bulk edits trigger any Element-Updated automations on the selected category. Confirm you want those automations to run before applying the change.
Undo: there is no single undo button for a bulk edit. Use the Project Activity feed to revert the affected elements one by one if needed.
